Entries in Scope,How To

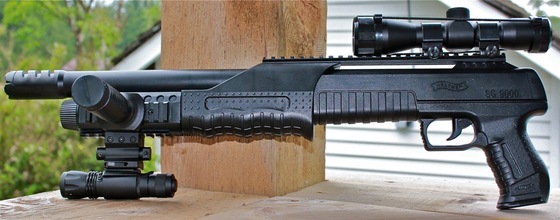
Umarex Walther SG9000 CO2 BB Shotgun Review

11 Comments

Type: CO2 BB Shotgun.
Manufacturer: UmarexUSA.
Model: Walther SG9000.
Materials: Plastic (polymer) and some metal construction.
Weight: 2.35 pounds.
Barrel: 11.5 inches, metal non-rifled.
Propulsion: CO2 x 1 (88 gram).
Action: Semi auto, double action only.
Ammunition Type: 4.5mm BB's
Ammunition Capacity: 40 shot internal spring fed magazine.
FPS: 480 (single shot) - 250 (three shot burst).
Trigger Pull: The trigger pull on the Umarex Walther SG 9000 is in the mid range and is a bit long but once you get used to it you can fire off shots very quickly with little resistance. There really aren't any sticky spots in the trigger pull to speak of.

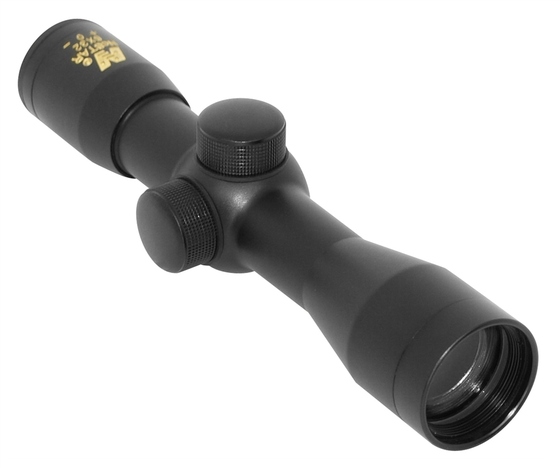
Accuracy: I shot this CO2 BB Shotgun at a target from the hip 20 feet away using my NcSTAR laser sight I installed on it in a free standing position, and it performed excellent getting a 1.5 inch grouping fairly centered on target. I also performed my accuracy test from 30 feet out in a semi-rested position using my 6x32 NcSTAR Scope and again I got a 1.5 inch grouping proving that a BB gun can show decent accuracy even from further out when setup properly. With my Chrony Chronograph testing I scored much higher then the factory claimed feet per second of 480fps in single shot mode and 250fps in three shot burst mode. I ended up getting an average 8 shot fps in single shot mode of 504fps and 309fps in three shot burst mode!
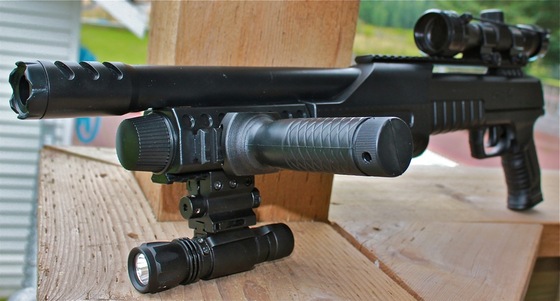
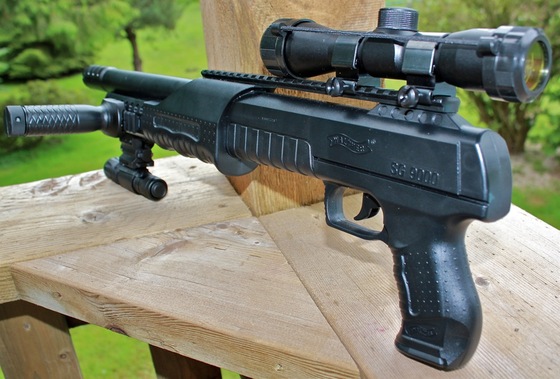
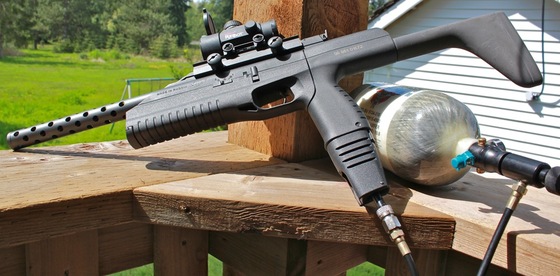
Build Quality: This is an almost all external polymer air gun with some metal components on the inside giving the Walther SG9000 a bit of a light to medium overall weight but once you add the large 88 gram CO2 cartridge and some accessories this gun can quickly gain a pound or two. All four accessory rails are metal along with the trigger. The fit and finish is very good on the SG9000 and the plastic quality seems very durable.

Realism: The Umarex Walther SG9000 is licensed by Walther but other then a similarity in the pistol grip it doesn't closely look like any specific Walther product or any specific Tactical shotgun for that matter. It does have a very tactical look and with a few accessories added you will have yourself a very persuasive looking shotgun on your hands.
Supplied by UmarexUSA - Can be purchased from: The Replica Airguns Store.

Pros:

  • Inexpensive versatile BB shotgun.
  • Nothing else really like it out there.
  • Multiple shooting modes - singe and three shot burst.
  • Uses 88 Gram CO2 so less stopping to change CO2.
  • Very good FPS readings - above factory claims.
  • Very accurate for a BB gun from close up and further out.
  • Lots of rail locations for all kinds of accessories and different customizable looks.
  • High capacity 40 round internal magazine.
  • Totally fun!

Cons:

  • The plastic exterior may put off some people looking for a heavier more metal gun.
  • 88 Gram CO2 can be a bit pricy, not as cost effective as 12 gram CO2.
  • Trigger pull is kind of long.
  • You will need to purchase some sort of a sighting system for it as all you have is a rail on top.

Comments:
The Umarex Walther SG9000 is a really fun and very inexpensive CO2 BB shotgun. With its multiple shooting modes you have the option of power and accuracy in single shot mode or to simply blow stuff away in three shot burst mode. The Walther SG9000 is also very customizable allowing you to really make this Tactical BB shotgun your own by decking it out with just about any combination of add ons and accessories you like! I found this gun the most fun to shoot in three shot burst mode using my laser sight and literally knocking down everything I pointed at!

Watch my YouTube Video Review of the Umarex Walther SG9000 CO2 BB Shotgun:

Categories: 4.5mm / .177 cal, Accessory, BB, CO2, Pellet, Pistol, Review, Scope, Semi Auto, YouTube Video Tags: NcSTAR, SG9000, Umarex, Walther

Umarex Walther SG9000 and S&W M&P 45 CO2 Airgun Preview

3 Comments

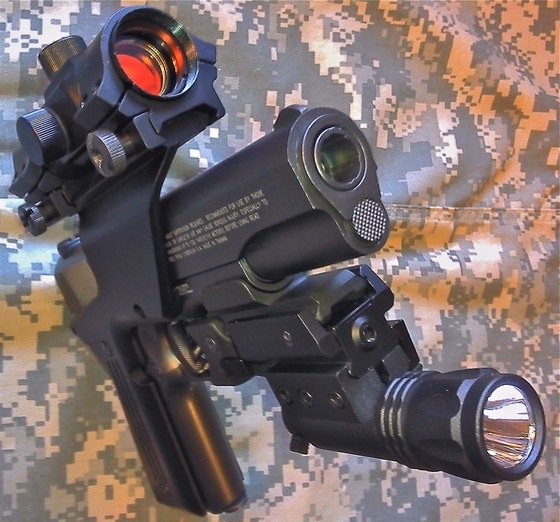
Before I get into my full reviews of the Umarex Walther SG 9000 BB Shotgun and Umarex S&W M&P 45 Air Pistol, I thought I would do a quick Preview so you could get a quick look at both of these fine Umarex products.

A few highlights worth mentioning about each air gun:

  • The Walther SG9000 shoots in both single shot and a 3 shot burst that fires all 3 rounds at exactly the same time, in the same manner that an actual shotgun would simultaneously fire all the buck shot.
  • The Walther SG9000 is capable of 480 fps and uses an 88gram CO2 cartridge so you can refill the 40 rounds spring fed magazine a multitude of times before needing to replace your CO2.
  • The Walther SG9000 does not come with any actual sights so you will need to add either a Red Dot Scope or Laser on to one of the many provided Picatinny rails located on the shotgun.
  • The S&W M&P 45 can shoot in both double action and also single action by pulling the rear portion of the slide back to cock the internal hammer allowing for a very light single action trigger.
  • The Smith & Wesson M&P 45 has a very nice solid weight to it, I was actually surprised at how hefty it was considering it has a mainly all plastic outer shell, my best guess would be close to 2 pounds. I think it's time to invest in a scale!
  • The S&W M&P 45 also has a recessed barrel giving the muzzle the large caliber look of a real 45 auto adding to the realism of this replica gun.

Take a quick look at these two Umarex products in my YouTube video:

Categories: 4.5mm / .177 cal, BB, CO2, Pellet, Pistol, Review, Rifle, Scope, Semi Auto, YouTube Video Tags: S&W M&P 45, SG9000, Umarex, Walther

Webley Alecto HP-01 .22 cal. Air Pistol Shooting Test

23 Comments

The Webley Alecto (AKA: Zoraki HP-01) may not fit in exactly as a "Replica" Airgun, although it does resemble a bloated Dessert Eagle! But it is an Airgun worthy of spending some time reviewing an this is now my third Vimeo Video review for the Webley Alecto. My first Video Review was a Table Top Review where I covered most of the Webley's basic operation. My second Vimeo Video was a Chronograph Test to see what my Webley Alecto could do performance wise for FPS.

<!-- google_ad_client = "ca-pub-9036472715040282"; /* Replica Airguns Content */ google_ad_slot = "1487049688"; google_ad_width = 468; google_ad_height = 15; //-->

I really wanted to do a video of this gun just shooting because that's what it does best, put lead down range very accurately! So I setup three cameras to capture it all from just about every angle I could think of and I set up 30 feet away from my target and shot 5 rounds in a rested position using a Red Dot Scope. The results where not surprising - pretty close to a 1/2 inch grouping!

If you're looking for a compact, hard hitting, accurate target or small pest control Air gun then look no further, the Webley Alecto has the goods!

Watch the full Multi-angle Vimeo Video of my Webley Alecto Shooting Test:

Categories: .22 cal, Field Test, Modification, Multi-pump, Pellet, Pistol, Review, Scope, Single Shot, YouTube Video Tags: Alecto, Webley, Zoraki

Umarex Walther CP99 Compact Recon BB Pistol Review

6 Comments

Type: BB air pistol.

Manufacturer: Umarex.

Model: CP99 Compact Recon Version.

Materials: Metal slide, polymer frame.

Weight: 1.8 pounds.

Barrel: 5 inches, non-rifled.

Propulsion: CO2 x 1.

Action: Semi auto, blowback, single action only.

Ammunition Type: Steel BBs 4.5mm.

Ammunition Capacity: 18 rounds.

FPS: Up to 400.

Trigger Pull: The trigger pull on the Umarex CP99 Compact Recon is amazing, it is short and light making it one of the best action shooters I own. You can fire this gun accurately and fast all day long.

Accuracy: Great! The addition of the Green Dot Scope and slightly longer barrel on the CP99 Compact Recon version work amazingly well, this is one of the most consistent BB shooter I own getting under 2 inch groups at will from 20 feet out.

Build Quality: Excellent, this BB gun is made in Japan and uses metal where it is really needed like in the slide, slide release, safety, trigger, magazine release, magazine and most of the mechanical parts. It's well made, well finished and feels great in the hand.

Realism: This Replica BB gun has many of the same characteristics of the actual 9mm P99 Compact with the exception of having a longer handle and much different safety mechanism. Umarex has even changed the design a bit with the newer CP99 Compacts and made the ejection port cut out adding to the realism of this BB shooter.

Available at: the Replica Airguns Store.

Pros:

  • Decent reproduction of the original Walther P99 Compact 9mm.

  • Would make an excellent training gun as it has a similar size, weight, and feel to the actual Walther P99 Compact 9mm handgun.

  • Blowback action is very firm adding to the realism of shooting this weapon.

  • Really good FPS, accuracy and CO2 efficiency for a blowback BB air gun.

  • The Recon version has a longer barrel adding a few more FPS to this already great air pistol.

  • Amazing light and fast trigger pull making it a blast to shoot.

  • Addition of the Sight Rail, Compensator and Green Dot scope really add to the esthetics and performance of this BB pistol.

Cons:

  • The Sight Rail, Compensator and most of the Green Dot scope are plastic but this does not seem to effect the performance in any way.

  • Safety lever seems out of place and takes away from the realism of this replica.

  • Switch on the Green Dot Scope is silver making it stand out from the rest of the all black air gun.

Comments:

I already loved the CP99 Compact non-Recon version so I had very high expectations for this BB gun to be at least as good if not better and I was not disappointed! I was actual surprised at the improvements that the longer barrel and Green Dot Scope made not only in a much higher Feet Per Second rating (about 75 fps), but also the much improved accuracy in what was already a decent shooter. For the additional $40, you get the Sight Rail which allows you to add multiple accessories if required. You get the Green Dot Scope that noticeably improved the accuracy, and you also get the compensator which hides the extra long barrel for more FPS.

Umarex Walther CP99 Compact.JPG
 
Categories: 4.5mm / .177 cal, Accessory, BB, Blowback, CO2, Field Test, Pistol, Review, Scope, Semi Auto, YouTube Video Tags: CP99, CP99 Recon, Compact, Umarex

Added NcSTAR Scopes to the Replica Airguns Store

1 Comment

I am really focused on adding more products all the time to the Replica Airguns Store and one product that was completely missing was rifle scopes.

I just listed 4 new scopes from NcSTAR:

NcSTAR - 6 X 32 Scope with Rings

C$49.00


NcSTAR - 6 X 42 Scope with High Rings

C$59.00


NcSTAR - 3 X 9 X 40 Scope with High Rings

C$49.00


NcSTAR - 3 X 9 X 40 Illuminated Scope with High Rings

C$85.00


Categories: Accessory, Replica Airguns News, Scope Tags: NcSTAR

Custom Baikal Drozd Full Auto 1200 Rounds Per Minute

2 Comments

I already have a customized full auto Drozd Blackbird who can pass up another Dorzd when the price is right! I will be making a double Drozd video down the road :)

My new Classic Drozd came with the Full Auto mod chip, the JimC hand made barrel, a 68ci Nitro Duck 4500 PSI carbon fiber tank and bulk air hose.

I also got the Red Dot scope with my new purchase but used one of my rial risers that fit perfectly giving my new Drozd an AR look to it.

 
Categories: 4.5mm / .177 cal, Accessory, BB, Bulk Air, CO2, Full Auto, Modification, Replica Airguns News, Rifle, Scope Tags: Baikal, Drozd

Benjamin Sheridan Super Streak .22 Caliber Break Barrel Rifle

2 Comments

I purchased a bunch of "near new" air guns from a friend of mine last week who was't using them anymore and thought I could put them to better use. I was happy to oblige!

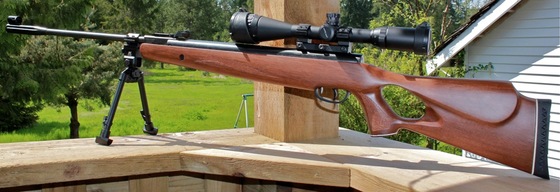
I already have the Crosman Quest 800 Break Barrel .22 caliber rifle for my pest control but you can always use one with more power! The break barrel Benjamin Sheridan Super Streak in .22 caliber is rated at up to 1000 fps and it is a real beast of an air gun to say the least. It came with a nice 4-16-40mm scope and I added an NCStar bi-pod to it to help distribute some of the weight.

I sighted it in at about 50 feet and was able to get about a nice 1 inch grouping with it from a rested position. I am looking forward to using this gun when my fruit trees start producing.

 
Categories: .22 cal, Break Barrel, Pellet, Replica Airguns News, Rifle, Scope, Single Shot, Spring Piston Tags: Benjamin Sheridan, Super Streak

BSA RED DOT RD03 SCOPE NOW IN THE REPLICA AIRGUNS STORE

6 Comments

We get requests for accessories all the time and one of the more popular requests is for Red Dot Scopes! I will be expanding the Replica Airguns Store more frequently now and posting new arrivals as we add them to the Replica Airguns Store.

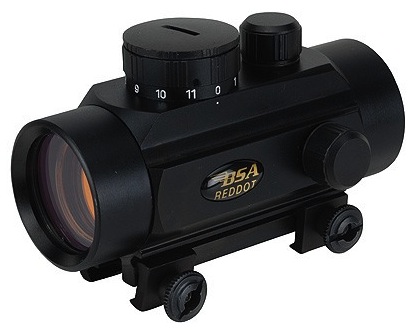
So to kick things off we have the BSA Multi-Purpose RD30 Red Dot Scope:

The BSA Multi-Purpose Sighting Systems are a wonderful light weight sight for close quarter and medium range targets. Light enough for small calibers plicking on the range, yet durable enough for larger calibers used by hunters and law enforcement departments. A great addition to your pistol or rifle!

  • 5/8 Weaver style attachment
  • Obj. Lens Diameter 30mm
  • 5 MOA
  • One Year limited warranty
  • 11 position rheostat 
Red Dot Scope BSA Multi-Purpose (RD30)
C$45.00


Categories: Accessory, Replica Airguns News, Scope Tags: BSA, Red Dot RD30

Umarex CX4 Storm gets some new toys - 3x9x40 Scope and Foregrip

2 Comments

Related Posts:

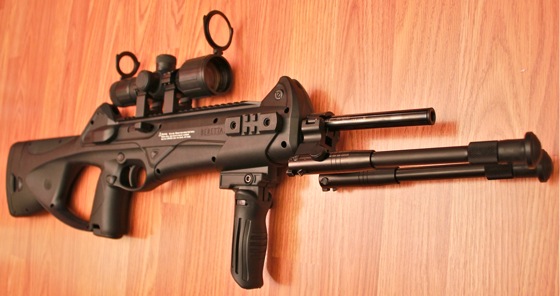
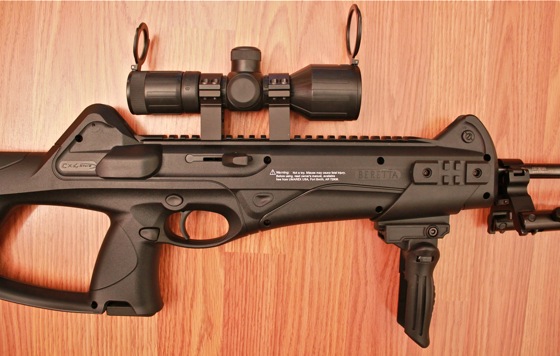
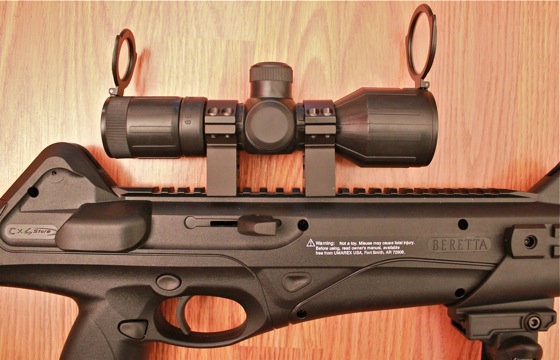
My scope mounting hardware came in today and I got right to work adding my new Aim 3x9x40 Rubber Scope and Foregrip to it. I wasn't planning on putting on the Foregrip, it just kind of happened and it looks good, so it may just stay on the CX4?

I ordered a Picitinny/Weaver Deluxe Riser Mount because I wasn't sure if the scope would clear the built in sites and I was thinking I wanted to mount the 3x9x40 Scope toward the rear but as it happened my high rise ring mounts where already the perfect hight and the Picitinny/Weaver Deluxe Riser Mount I ordered wasn't required!

Guess I'll have to shelf the Riser Mount for another project, I'm sure one day it will come in handy.

Some more pictures of the new setup:

Categories: 4.5mm / .177 cal, Accessory, Blowback, Pellet, Rifle, Scope, Semi Auto Tags: Beretta, CX4 Storm, Umarex

A few new Accessories - Red Dot - Scope - Foregrip

3 Comments

I have been wanting to get a suitable scope for my Umarex CX4 Storm for a while but have been busy with the Holliday Season, today I made it out to Panther Paintball, a local paint ball store in my area to see what they had in stock. Sometimes I find paintball stores have a better air gun accessory selection then even many full fledged sporting goods stores that sell guns?

I was in luck because they had some good deals going on, one of which was a nice 3x9x40 Rubber Coated Scope made by AIM SPORT INC.

The only problem I had is that it did not have the right mounts for my CX4, it came with mounts for an M16 Carry Handle instead. So I added a Deluxe Riser Mount and some High Profile Picitinny/Weaver 30MM Rings - Problem solved!

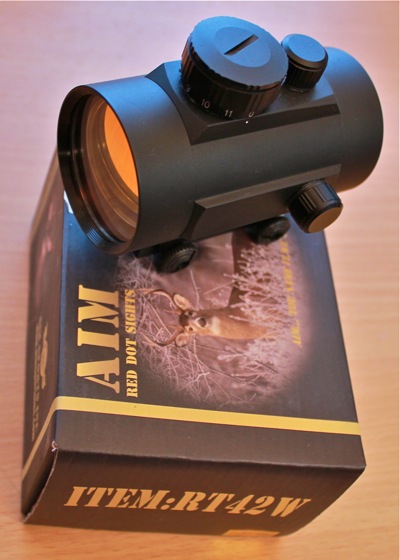
I also have another rifle coming next week that I want to add a Foregrip and Red Dot Scope to, again Panther Paintbally had a 1x42 Red Dot Scope made by AIM SPORT INC. that was on sale and just what I was looking for.

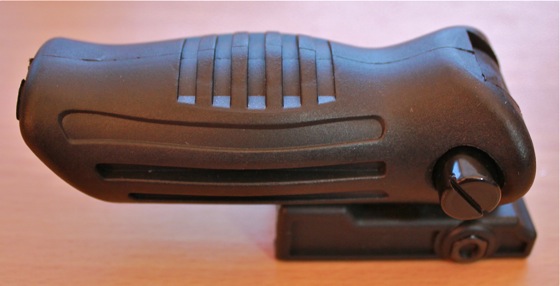
Lastly, I found a Foregrip much like the one I have on my Steel Storm but without the Tactical Flashlight built in. I didn't really need the light on this new gun anyways.

Now I'm set for next week when I hope to get all the parts I need and of course my new rifle...

Categories: Accessory, Scope Tags: CX4 Storm

Cybergun - KWC Mini UZI BB Gun Full Auto Modification

39 Comments

Related Posts:

"Before you attempt to do this modification you need to be aware that it may void your warrantee and/or you may fail and either break something or incorrectly reassemble your Mini UZI rendering it "Broked"! This is your problem so please do not attempt this modification (even though it is fairly easy to do) unless you're 100% confident you can do it and are aware of the possible consequences. Make sure to also take into account any gun laws in your area prohibiting full-auto capable firearms!"

(Special thanks to Herman for showing me the ropes on this modification)

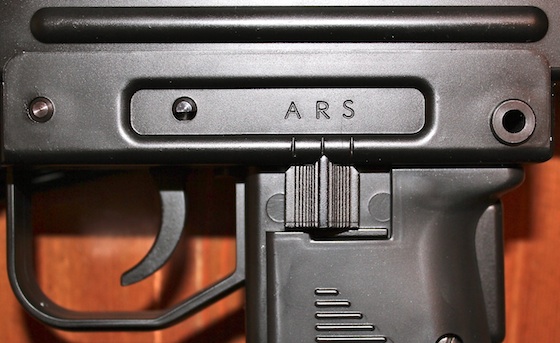
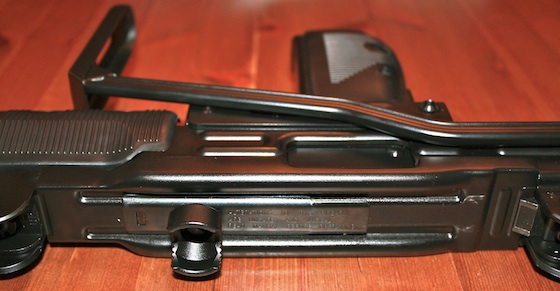
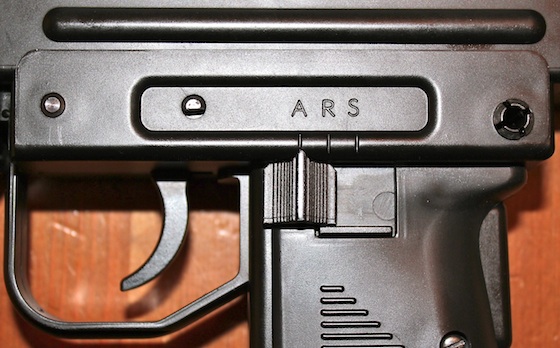
This modification will make your semi-auto "only" Cybergun/KWC Mini UZI BB Gun into a full auto capable 4.5mm BB machine gun. From the factory the full auto switch position (Far Left "A") is disabled but the full auto selector position is visible. The actual full-auto functionality is still present in the Mini UZI but has been decommissioned by the simple means of blocking the selector switch from being moved to the far left full-auto or "A" position.

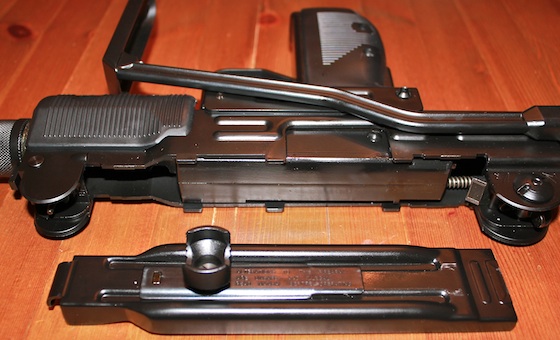
This full auto modification will show you how to disassemble the Cybergun - KWC Mini UZI BB Gun and remove the small plastic selector switch blockage so you will be able to manually switch between semi auto and full auto modes. This modification takes about 15 minutes to complete.

<!-- google_ad_client = "ca-pub-9036472715040282"; /* Replica Airguns Content */ google_ad_slot = "1487049688"; google_ad_width = 468; google_ad_height = 15; //-->

You will need the following tools: A pair of pliers and either a pair of small wire cutters or a file.

Let's begin! Below are the two pre-modification positions available from the factory:

"S - SAFE"

"R - SEMI AUTO"

Below is a closeup of the top bolt cover that we will be removing to access the internal bolt for removal:

In the next photo we have removed the bolt cover by pressing the "angled button" towards the rear sight:

And now the bolt is removed:

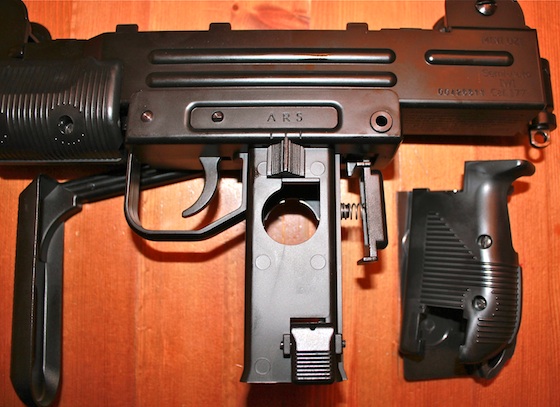
I removed the grips but this is not necessary:

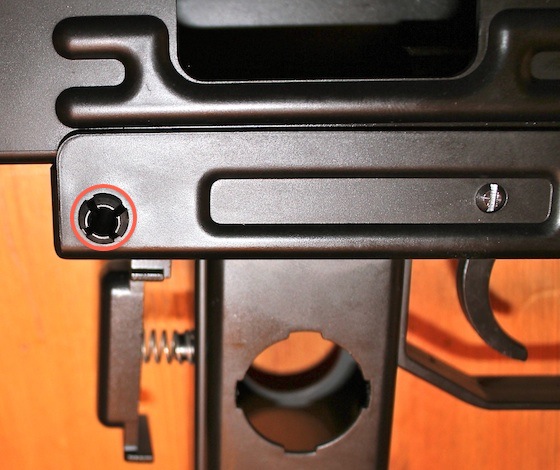
Now you will need to remove the lower receiver pin located at the back end of the receiver closest to the grip safety. Use a pair of pliers to pinch the metal pin while pushing it through. Once the pin is started you can use the pliers on the other side to pull the pin all the way out. You may need to us a fair amount of force to do this as the fit of the pin is tight:

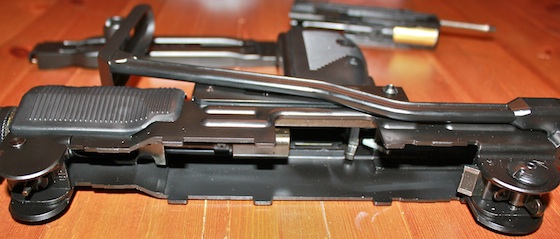
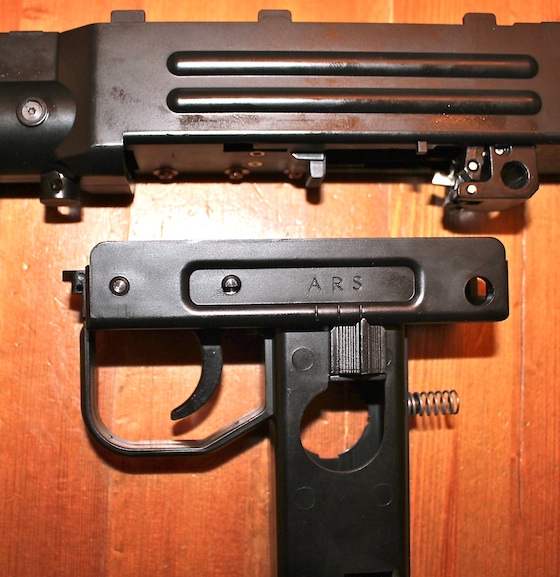
Once the pin is removed the lower receiver can be detached:

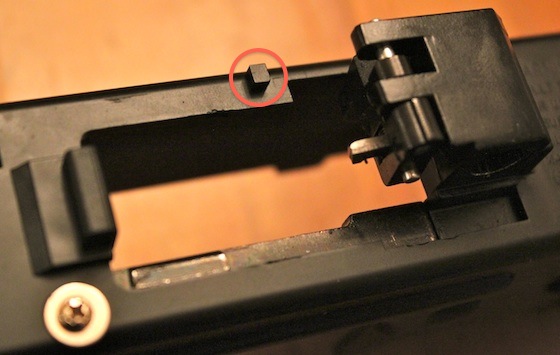
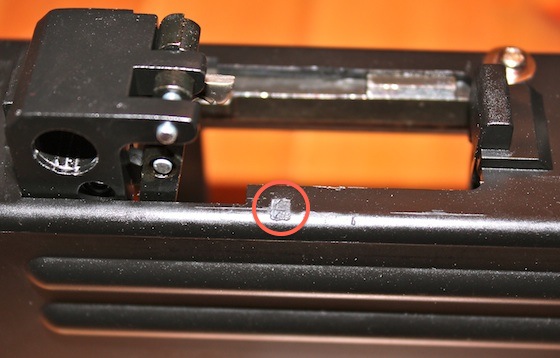
You can see in the picture below the small plastic nub that we will need to remove in order to restore full-auto capability:

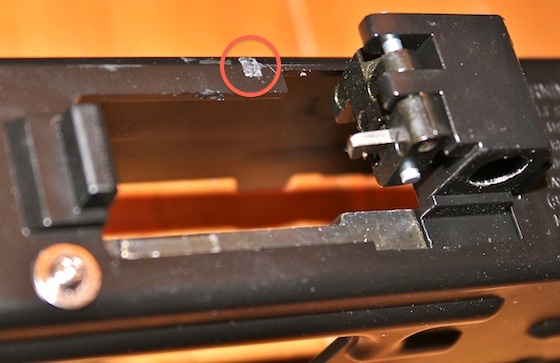
I used a pair of small wire cutters to clip this plastic nub off, but you could use a file too. Just make sure that the plastic is flush and does not have any burs or protrusions.

Below is a photo of the Plastic Nub removed from another angle:

After that, all you need to do is reassemble you Mini UZI in revers order to finnish the Full Auto modification.

In the below Photos you can see we have restored the ability to move the fire selector switch over to the "Far Left" or "A" position, reenabling the Cybergun - KWC Mini UZI BB Gun to shoot in full auto when desired.

"A - FULL AUTO"

Now enjoy your Cybergun - KWC Mini UZI BB Gun in full-auto as it was originally designed!

Here is my Vimeo Video in Narrative with Photos:

Categories: 4.5mm / .177 cal, BB, Blowback, CO2, Full Auto, How To, Modification, Pistol, Semi Auto, YouTube Video Tags: Cybergun, UZI

SIG SAUER X-FIVE P226 TAKE DOWN FOR STRIPPING AND PAINTING

17 Comments

This Article was graciously provided by one of my viewers: Lee

Related Posts:

DISCLAIMER, PLEASE READ AND UNDERSTAND!

  • This walkthrough is for information purposes ONLY, if you decide to dismantle your BB gun you will void any warranty you have with the manufacturer.
  •  I will not be held accountable for your actions or any damage that is caused by your negligence. Therefore, if YOU decide to dismantle your BB gun and break something during the dismantling or assembling it is your problem not mine.
  • If you don’t feel confident or comfortable doing any of these steps STOP and do not proceed any further or you may do damage.
  • YOU WILL LOOSE ALL THE SIG SAUER MARKINGS ON THE GUN.

Having said all that, this is my first ever instructional so I’m going to try and make this walkthrough as easy as I can for you to understand. You will need the following: Flat tip Screwdriver for the grips, Small Philips Head screwdriver, small punch & needle nose pliers – the last 2 are optional.

Make sure you have a clean work space and lay out every part in the order that you remove it Left to Right, come reassembly time you work Right to Left it makes reassembly so much easier.

Step 1:

Field Strip the slide until it looks like this:

Unscrew these 2 screws, these hold in the “Breech Block” once your unscrewed cup the end of the slide in your hand and let the Breech & Screws fall in your hand – Set these aside.

That’s it your Slide should look like this:

It is now ready for paint removal.

Step 2:

Take the Frame and start removing the grips Left hand side first:

Flip the frame over and remove the right hand side grips:

Carefully remove the trigger return spring, it is under tension and it WILL fly across the room – I spent an hour looking for it one day! Also while we are at it, you can remove the cover to the magazine release.

To remove the safety, place your flat tip screwdriver between the frame and the safety and twist ever so gently this will separate the safety and all you need to do now is grab the safety from either side and gently pull & wiggle until it separates.

Once the safety is removed you will see the safety bar, this lifts off.

Step 3:

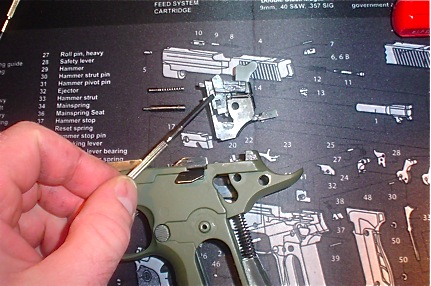
Lift this little pin out and remove the spring, very carefully push this pin from the other side and remove, be careful because once this happens your hammer assembly is loose and free from the frame.

Slowly and gently remove the hammer assembly:

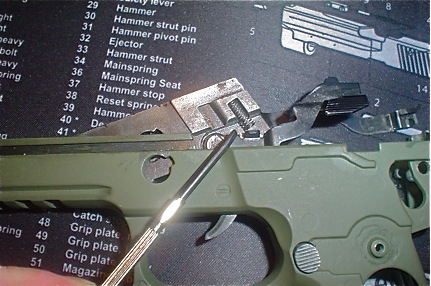
Note the little shiny piece that sits on the side of the hammer assembly, try very hard not to let this piece fly out, it is a pain to get back in, if it does fly out keep calm and take your time, don’t force the little spring in, it seats in behind the shiny metal thing – sorry I don’t have a proper name for it.

Also make sure that the spring next to it is in the locked open position, if it snaps back just get the tip of a small screwdriver and slide it to the left until it locks.

The hammer return spring assembly at the back of the grips can be removed and set aside.

Removing the trigger assembly is easier than it looks; you need to remove the takedown lever by rotating it counter clockwise until it stops.

Push it through the frame and rotate it back clockwise to remove it all together.

Remove the screw holding the trigger assembly:

Lift out the trigger assembly; be careful of the slide lock spring it wont Fly out, but it will fall out.

If you want to remove the magazine release, there is a spring that sits at the rear of the trigger guard;

Push the magazine release in part way & with the flat tip screwdriver lifts the up to remove it, once removed the magazine release will simply fall out.

THAT’S IT! We’re done, ready for the paint removal. Any paint stripper is fine.

KEEP IT WELL AWAY FROM THE PLASTIC PARTS!

Follow the manufacturer’s guidelines for use of their product and thoroughly clean the slide and frame after you have removed the paint.

YOU WILL LOOSE ALL THE SIG Sauer MARKINGS ON THE GUN.

Rub over the slide and frame with #0000 Steel wool or 1200 grit Wet & Dry paper. Clean again and using the paper or steel wool with some ALUMINUM polishing compound like Autosol and some good ol fashioned elbow grease polish the slide and frame until you reach your desired outcome. Clean it all down again and wipe it down with a rag that has had gun oil or my preference “Fluid Film”.

Reassemble the gun in the reverse order and viola one shiny SIG Sauer X-Five.

Categories: How To, Modification Tags: Cybergun, Sig Sauer X-Five P226