Entries in Pump,How To

Air Venturi V10 Match Pellet Pistol Field Test Review

No Comments

When it comes to accuracy, match grade pellet pistols are going o be your best bet, not always the most powerful but they are sure good at driving pellets down range with super small groupings. The Air Venturi V10 Match Pellet Pistol is no exception to this statement and considering all that it offers it is fairly reasonably price for a match grade pellet pistol of this caliber.

Right off the bat I have to admit that my Chrony Chronograph stopped working, all I get is gibberish on the screen (Strike two for Chrony!). So I was not able to get any personal Chronograph results even though I even tried using my Airsoft Chronograph without success :( I did however watch a few other Youtube Video reviews where users tested out the FPS using a similar Chronograph and the Air Venturi V10 Match Pellet Pistol should get right around 390 fps using 7 grain lead pellets, this is close to the 400 fps claimed velocity.

Now for my shooting results that I was able to deliver on... I shot about 6-7 rounds downrange on a fresh paper target setup around 30 feet away. Sitting with a sandbag up front for stability, my Air Venturi V10 Match Pellet Pistol shot 6 out of the 7 rounds all in one hole that stretched out to about 1/4 of an inch. I did get one flyer that extended the grouping to about an inch, but this gun is a accurate no doubt even with my limited shooting skills.

The Trigger, sights and even the pistol grip on the Air Venturi V10 Match Pellet Pistol are fully adjustable so you can setup your Air Venturi V10 Match Pellet Pistol pretty much any way you like but it is made for a left handed shooter, at least the one I had tested out. The trigger is very light weigth out of the box and should be good to go for most people. It's also nice that you only need one pump for full power which saves you a bit of time in-between shots. All in the Air Venturi V10 Match Pellet Pistol is a great well priced match grade target pistol ready to drive virtually anything you point it at!

Categories: 4.5mm / .177 cal, Field Test, Pellet, Pistol, Review, Single Shot, YouTube Video, Pump Tags: AirVenturi, V10 Pellet Pistol

The Best Way to Hold Your Airgun

No Comments

I made a similar video about how to hold your airgun a while back but sometimes they get a bit buried in all the video I make. I feel it's really important how you grip your gun even if it's only an airgun with very little kick or recoil. Proper pistol grip is something you should use no matter what so that you can carry it forward to what ever gun you are shooting.

More kick or recoil means a firmer grip is required to hold the gun so when shooting a powder burner with lots of kick grip becomes even more important.

In this video I go over the proper two handed grip to use when holding a pistol, which hand to hold lose and which had to grip tight, how to overlap your fingers and thumbs.

Categories: Airsoft, BB, Break Barrel, CO2, Blowback, How To, Non Airguns, Paintball, Pellet, Pistol, Real Gun, YouTube Video Tags:

Why is My CO2 Airgun Not Working?

23 Comments

One of the most common types of question I get on my Replica Airguns YouTube channel has to be something like… Why is my Airgun not working? Most of the time the amount of info about the problem is limited to something like… “It was working yesterday but now it’s not working anymore” or something like “when I pull the trigger nothing happens”. My personal favorite is… “I took my gun apart and now it doesn’t work!”

I just made a similar video for Blank Guns and as I said in that video, trying to trouble shoot a mechanical or technical problem over the internet is very difficult, this goes for cars, guns, computers or what have you…

In this Why is My CO2 Airgun Not Working video I will however cover some of the more common and obvious problems I have seen relating to why a CO2 Airgun may not be working properly. I really don’t get a lot of questions about Spring Piston or Pump Airguns so I will be focusing on CO2 Airguns in this video. There will be a lot of crossover with CO2 Airsoft guns so this video may be helpful for some of you Airsofters out there

First let’s get the super obvious stuff out of the way! 

  • Did you put a new CO2 cartridge in it and is it pierced all the way?

  • Did you load BB’s or Pellets into the Airguns magazine and is the magazine in the gun correctly?

  • Is the safety off?

  • If the gun is a blowback semi auto single action Airgun then did you pull the slide back prior to the first shot?

CO2 Related Problems:

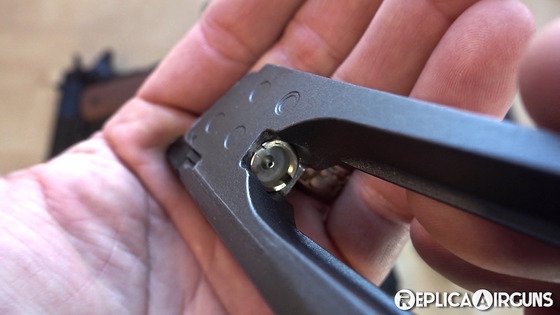
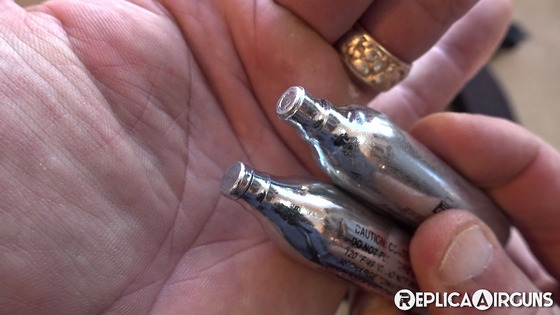
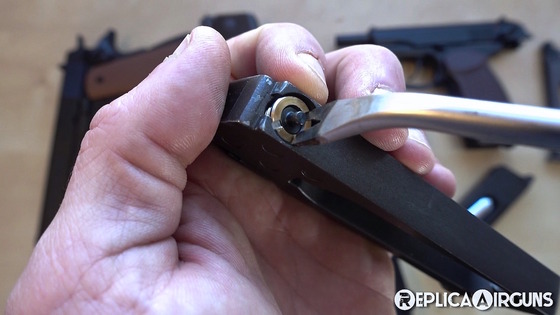
Not all CO2 cartridges are created equal, they often have slightly different shaped nubs on them and some brands will work better than others in different Airguns. If the shape of the CO2 nub does not fit properly into the valve area then it may not pierce or it could pierce but then not allow you to tighten it all the way losing all the CO2 in the process. If the CO2 is coming form the airguns handle to CO2 Valve area then this is an indication that your problem is related to the area where the CO2 enters the airgun.

There is a seal where the CO2 cartridge buts up to the valve, this seal can be damaged or even deformed from usage or even leaving your CO2 in the gun for too long. The outside CO2 Valve seal can also take the shape of a specific CO2 nub so when you use a different brand CO2 the seal may not properly make concat with the new CO2 type you are using, again causing leaking or even the total loss of all your CO2. Watch my YouTube video on “How to Fix Leaking CO2 in an Airgun”.

CO2 Valve Related Problems:

Again, make sure that Outside CO2 Valve Seal is in good condition and any leaking is not being caused by this problem, if you have checked the Out Side Seal and everything is OK with it then perhaps there is a problem with the CO2 valve?

One indication that your CO2 Valve might be the culprit is the total loss of all your CO2 when you try to insert and tighten a new CO2 Cartridge. Usually all the CO2 will exit the barrel, not the handle or valve area. What may be happening is the valve is stuck open or the internal seal is broken or deformed. If this is the case you will have to remove the valve and have a look inside, this is a lot easier on CO2 airguns that have the CO2 valve in the magazine, if the CO2 valve is in the actual Airguns then a lot more disassembly may be required and I would recommend an Airgun technician take care of this for you.

If the gavel is in the magazine then you will have to unscrew it, you may require a special tool for this? Once the valve is out of the magazine  take a look inside and examine the internal seal, also look for any bits of metal shavings as they can disrupt the action of the valve causing leaking. Give the inside of the valve a good clean and then lubricate it with some silence spray. hopefully that fixes your problem!

BB’s getting Stuck in the Blowback Gas Tube:

I have actually made a dedicated video for this problem so I will put a link to it in the description of this video. The main reason people may have this problem is because we all like to rack that slide on our full blowback Airguns, but if you have a fully loaded magazine then each time you reach that slide without shooting the gun, you are inadvertently trying to load another BB into the breach area, the breach is only designed to hold one BB at a time so after a few racks of the slide the newly loaded have no place to go but into the Gas Tube where they can get stuck and cause having to the operation of your Full Blowback CO2 Airgun.

BB’s Rolling Out of the Barrel of Your CO2 Airgun:

This is not actually a fault of the gun but happens because of the way the gun is designed. This situation can happen with certain CO2 Airguns when the gun user pulls the trigger really slowly while the gun is point slightly in a downward position. What is actually happening is the first part of the trigger is made to draw a BB from the magazine into the breach of the gun. If the barrel of the gun does not have a rubber hop-up stopper in it then the BB is free to roll down the barrel and out of the gun. How do you fix this problem? Be more committed to your trigger pull and or shoot at a target that is not so low. Perhaps place your targets slightly higher than the gun so the barrel is not pointing down, especially if you like to take your time with the trigger :)

A Little Maintenance Can Go a Long Way!

Sometimes a good cleans is all you need to do to get things working as they should, again I have already made video Tutorial Showing “How to Clean Airguns and Blank Guns”.

What about stuff like My Airgun is jammed or my trigger is stuck or some random part fell out of my gun?

There is only so much I can cover in this video, most other problems are going to get a bit more complicated to fix and I suggest if your Airgun is not working and the suggestions I have made in this video do not solve your problem, then consider taking your gun into a gun tech.

Categories: 4.5mm / .177 cal, 6mm, Airsoft, BB, Blowback, CO2, GBB, How To, Pellet, Pistol, Review, Semi Auto, YouTube Video Tags:

Why is My Blank Gun Not Working?

6 Comments

First off I want to say it’s hard to trouble shoot technical or mechanical problems over the internet regardless of if ithas to do with guns, cars, computers or pretty much anything where unless you are there in person it’s really hard to figure out the problem.

But I will attempt to address some of the more common issues why a blank gun may not be functioning properly.

Why is my Semi Auto Blank Gun Not Cycling or Ejecting Shells?

One very common reason a blank gun may not be cycling the shells properly is because the owner has removed the barrel restrictor plug. People usually do this to make the barrel opening look more realistic but the barrel restrictor is a necessary component to increase the back pressure allowing the slide to cycle fully to the rear position so it can eject and pickup a new shell.

The blanks you are using may not have enough gun powder in them. Some blank guns require banks with more gun powder than others, again this additional internal pressure forces the slide all the way back, if the blank does not have enough gun powder in it then only a partial slide motion happens and so the discharged shell may not eject properly, in this case the user would have to clear the blank gun manually so another shell can then be picked up and loaded into the breach.

If your blank guns is dirty or not lubricated then it may act sluggish again restricting the full movement of the slide which will effect correct operation. Make sure to thoroughly clean and lubricate your blank gun, that may be a quick fix for you!

You may have a faulty extractor? The extractor is like a hook that grabs the discharged shell while the slide is in the reward position pulling or extracting the shell out of the breach. If the extractor is worn or broken then the empty shell will not be ejected from the breach so when a new shell is picked up from the magazine it has nowhere to go and usually you will get a jam-up in the ejection port area.

One final situation that can cause your blank gun to not cycle properly is to strong of a slide spring, some blank guns out of the box just come with a really heavy slide spring, so much so that even blanks with lots of gunpowder in them are still not strong enough to make the slide operate full motion. Your only option here would be to replace the heavy slide spring with a lighter one.

Why Are My Blanks Not Firing?

This is a situation where you pull the trigger and nothing happens. Lets get the obvious causes right out of the way here… Did you put blanks in your gun and are they new blanks? Did you chamber the first round in your semi auto pistol?

So now that that’s out of the way let’s look at some other reasons why your blank gun may not be firing a blank. Perhaps the firing pin is broken? Most blank guns are not made out of carbon steel and even the firing pins can be lesser quality than what you would find in a real gun so blank guns are more prone to breaking than real guns. I have seen broken firing pins in blank guns first hand so make sure to check the firing pin and that it is fully operational.

Try changing up your blanks to another brand? Again blank gun ammunition is not made to the same higher standards that real firearm ammo is made and some primers may require a little more pressure than your gun is providing. Even with real guns an ammo change may help the gun operate better.

Why is the Trigger or Hammer Not Operating Properly?

I have come across blank guns where there are mechanical problems in the trigger and hammer areas, you may be able to address this yourself but I would recommend taking your blank gun to a gunsmith since you will have to take the gun pretty much full apart to fix a problem in the trigger and hammer areas.

Of course make sure your gun is clean and lubricated, this can help a lot with the mechanical areas of your blank gun.

One problem I saw with a few EKOL Special 99’s was specifically with the single action potion of the trigger, when I would pull the hammer back it would not lock back and the hammer would often slip and fire randomly, this is rather dangerous. When I took the gun apart I found that the table top or step that the trigger was supposed to catch on was worn down on the edge so it would simply slip off. I was able to fix this by filing a new edge on the step area. Again this can happen because blank guns are not made out of as high quality metal materials as real guns.

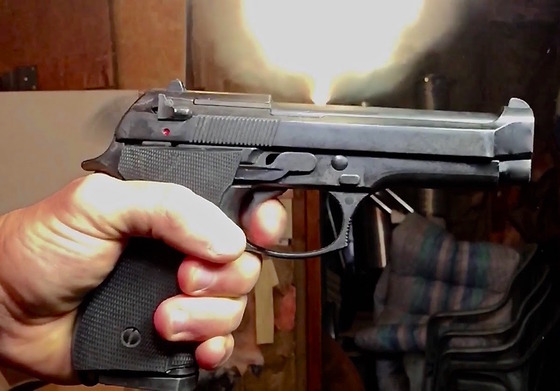
Why does the Flame Come out the Top of My Blank Gun and Not the Front?

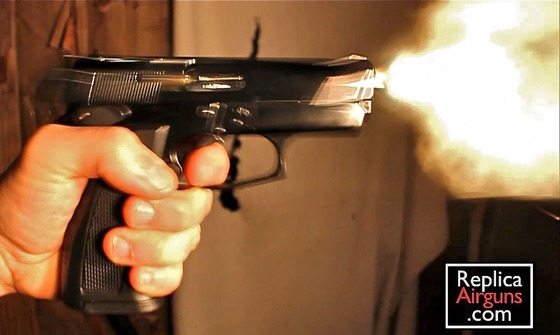
If you find that the flame or discharge comes out of the top of your blank gun and not the barrel, this usually does not mean anything is wrong with your blank gun. All it means is you own a top venting blank gun and not a front firing blank gun. In some countries front firing blank guns are not allowed but front venting blank guns are. The same may also be reversed in some countries, for instance here in Canada we can only import front firing blank guns with flare adaptors since our blank guns are imported under the assumption that they are to be used as signaling or flare devices.

Can I Convert my Top Venting Blank Gun into a Front Venting Blank Gun?

I really don't recommend altering a blank gun in any way as it may be a violation of your local laws and it could cause the blank gun to malfunction in a very bad way causing serious injury or even death!

In theory I suppose it may be possible to convert your Top Venting Blank Gun into a Front Venting Blank Gun but again you would need to allow for just the right amount of back pressure so a wide open barrel would not work unless it was a revolver. You can not simply remove the red plug and bingo you have a front firing blank gun because in most cases the barrel will be completely plugged in the frontal region. Not only would you need to drill out the plugged portion of the barrel but you would also have to somehow fill in the top venting area and again makes sure to allow for just enough back pressure to cycle the slide back and forth.

Hopefully this has helped some of you with blank gun issues. If you’re looking for a blank gun make sure to come down to www.ReplicaAirguns.ca and www.ReplicaAirguns.us and have a look in our blank gun area of our online stores.

Categories: .22 cal, 380, 6mm, 8mm, 9mm, Blank Gun, How To, Pistol, Review, Revolver, Semi Auto, YouTube Video Tags:

Gletcher NGT NGT-R CO2 BB and Pellet Revolver Follow-up

No Comments

I already made several review videos for both Gletcher NGT (4.5mm Steel BB) and the Gletcher NGT R (.177 Cal Pellet) Revolvers, including table top and shooting videos. So make sure to check those videos out for more information on both versions of Gletcher NGT and NGT R Revolvers.

I did however miss some noteworthy details that I wanted to cover in this video. Firstly, the real steal Nagant M1895 Revolver this Gletcher NGT is styled after has a very unique gas-sealing system that the Airgun version does not replicate or really require but it is worth mentioning.

Here is some more info on how the original Nagant M1895 Revolver Gas Seal System works:

(From Wikipedia) The M1895 by contrast, has a mechanism which, as the hammer is cocked, first turns the cylinder and then moves it forward, closing the gap between the cylinder and the barrel. The cartridge, also unique, plays an important part in sealing the gun to the escape of propellant gases. The bullet is deeply seated, entirely within the cartridge case, and the case is slightly reduced in diameter at its mouth. The barrel features a short conical section at its rear; this accepts the mouth of the cartridge, completing the gas seal. By sealing the gap, the velocity of the bullet is increased by 15 to 45 m/s (50 to 150 ft/s.) This feature also eliminates the possibility of injury through the dangerous expansion of gases from the cylinder behind the barrel, which are easily capable of severing a finger if the user holds the gun incorrectly (with a finger positioned in front of the cylinder during fire) - a noted safety-issue in conventional revolvers.

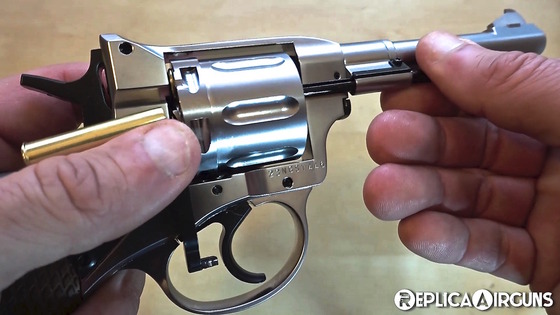
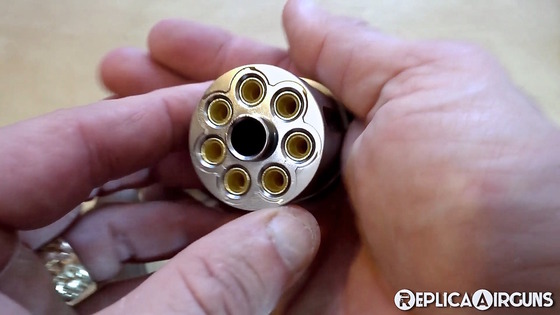
Moving on to some of the features incorporated into the Gletcher NGT NGT-R CO2 BB and Pellet Revolver that I did not point in any of my previous videos. There is an extractor rod that can be used to extract a shell, this is not really necessary on the airgun version since the shells do not expand and tighten on the cylinder as they would n the real steal Nagant M1895 Revolver built is nice that we can replicate this feature with the Airgun version. You can also remove the cylinder completely from both the BB and Pellet shooting Gletcher NGT NGT-R CO2 Revolvers. The cylinder is actually very heavy and adds a lot of weight to this compact 7 shot Revolver.

It is always nice when an Airgun is built in such a way that it replicates the real steal version as closely as possible and the Gletcher NGT NGT-R CO2 BB and Pellet Revolvers do this nearly perfectly.

Categories: 4.5mm / .177 cal, BB, CO2, How To, Pellet, Pistol, Review, Revolver, YouTube Video Tags: Gletcher, NGT, NGT R

How to Get Rid of That Ugly White Writing on Your Airgun

1 Comment

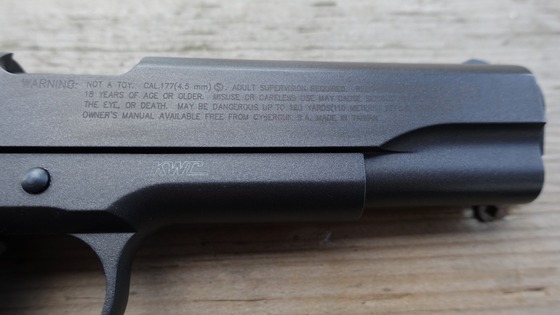
I get asked on a daily bases form many of my Vimeo Viewers about how and if there is a way to get rid of the White lettering on Airguns, Typically people are wanting to remove the intrusive Warning instructions from Airguns like the Cybergun Tanfoglio Witness 1911, the Cybergun/Swiss Arms GSG 92/P92 and many other CO2 Replica Airguns that have lettering or branding that you may want to get rid of.

In this Instructional Tutorial Video I show you how can at least tone down the white lettering and even completely remove it on some Airguns without damaging the Airguns finish underneath the white lettering. You will have to use some patience and perhaps repeat this method a few times but the end result is worth the effort.

The magical product I use to remove the white lettering on many popular Airguns is a product from Birchwood Casey called the Presto Gun Blue Pen. This product is actually designed to touch up real steel gun in areas where the blueing has worn off, lucky for us the Birchwood Casey Presto Gun Blue Pen also works well to remove the ugly white lettering from Airguns.

Categories: 4.5mm / .177 cal, 6mm, Airsoft, BB, Blowback, CO2, How To, Pellet, Pistol, Review, Revolver, Semi Auto, YouTube Video Tags: Cybergun, KWC, Umarex

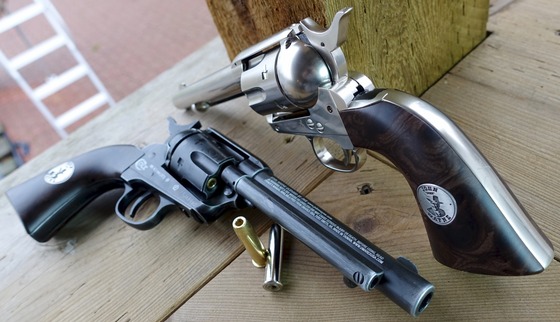
Which Shells Work in Which Shell Loading Revolvers?

No Comments

I have often been asked which of the Shells for the Shell Loading Revolvers work in which Shell Loading Revolvers? After all many of them look a lot alike so can you mix and match Shells for the various types of Shell Loading Revolvers?

In this Vimeo Instructional Video I test out a bunch of Shells to see which ones actually will work or not work in several of the most popular Shell Loading Revolvers.

Some of the Shell Loading Revovers Tested in this Instructional Video are:

Categories: 4.5mm / .177 cal, 6mm, Airsoft, BB, CO2, Comparison, How To, Pellet, Pistol, Review, Revolver, YouTube Video Tags: 357, ASG, Colt Single Action Army, Dan Wesson, Dan Wesson 715, G731, Gletcher, KWC, NGT, NGT R, Umarex, Webley

Can I put real 1911 Grips on my KWC-Cybergun 1911 BB-Airsoft Gun?

No Comments

With the popularity of the KWC - Cybergun 1911 Blowback CO2 Pistols and how super realistic they are in so many ways, it is no surprise that people often ask me if they can replace the original grips with grips made for a real 1911.

The short answer is yes you can! You will have to be prepared to remove just a little bit of material from the backside of both grips near the bottom of the handle where there is an area that has been flared out to accommodate the CO2. Not really a big deal, you can use a Dremel for the quick and easy approach or even some sand paper if you don't mind taking a little more time.

In this Vimeo Video I demonstrate using grips that fit a real 1911 and show you just exactly where you will need modify them to fit on the KWC and Cybergun CO2 Blowback 1911 pistol series.

Categories: 4.5mm / .177 cal, 6mm, Airsoft, BB, Blowback, CO2, Comparison, How To, Modification, Pistol, Real Gun, Semi Auto, YouTube Video Tags: Colt Government 1911, Cybergun, KWC, Model 1911, Tanfoglio Witness 1911

No Orange Tip On Your Airsoft Gun! Are You Insane?

No Comments

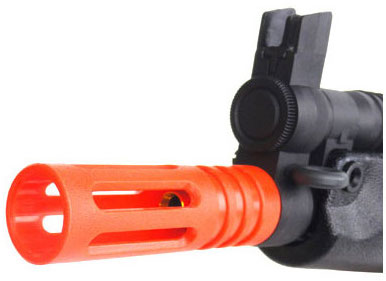
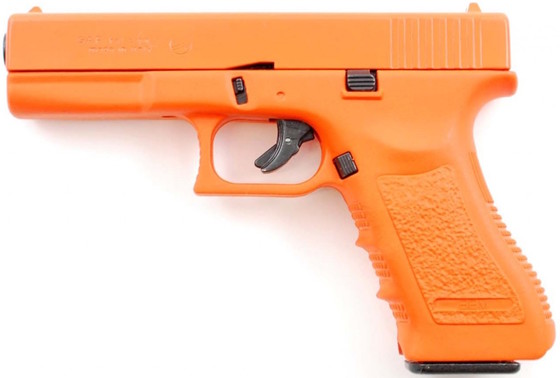
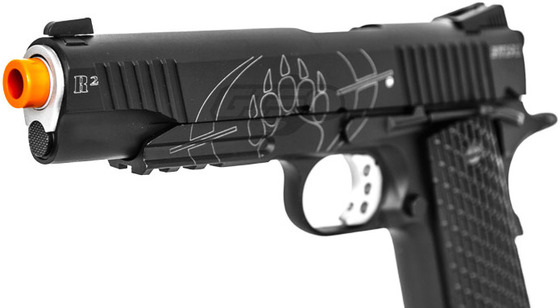
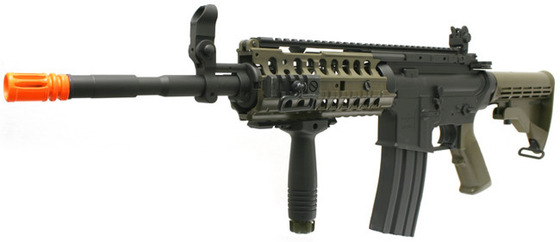
Whether you like it or not, most of us have come across an Airgun with an ugly orange tip on it at some point. In most cases you will find the intrusive orange or red tips on Airsoft guns that shoot plastic BB's, in some cases you will even find them on Airguns that shoot either lead pellets and/or steel BB's.

It really comes down to where you live as to what your local gun laws have determined is required for your area. You may even live in a region where Airguns and Airsoft guns are not allowed at all! So for you a red or orange tip on the front would be welcome if it would allow you to own an Airgun or Airsoft gun. What about the entire gun being painted a bright color, well that is the case for some folks so again having a red or orange tips may not be as bad as it originally seemed...

In Canada where I live, we used to only be allowed Airsoft guns that had clear sections as our replica gun laws are very strict and all black Airsoft guns would have fallen iinto the "replica" category if they did not have large clear plastic see-through sections on them. This clear section law was revised somewhat over the last several years to allow for all black Airsoft guns here in Canada. It was determined that many Airsoft guns with higher fps limits could cause a serious injury to a human, making them less of a toy in the eyes of the law and more of a weapon. Because of this, Airsoft guns that are capable of shooting a .20 gram plastic BB at a velocity of 360 fps or "higher" are now considered to be similar in the eyes of the law to a regular steel BB or lead pellet shooting Airgun. In Canada, Pellet and Steel BB guns are actually considered firearms of a sort so this allows the higher fps Airsoft guns to be all black since it can not be a replica of a firearm if it is in fact considered to be a firearm by law.

The long and short of all of this is that here in Canada we do not require our Airsoft guns to have orange or red tips since they are considered more or less to be just like any other Airgun and our Airguns do not have red or orange tips either.

Getting back to the title of this article "No Orange Tip On Your Airsoft Gun! Are You Insane?" I often get folks from the US giving me heck for removing the orange tips from my Airsoft guns or asking me why my Airsoft guns don't have them in the first place. These people even state that I could get in a lot of trouble for this! Perhaps they think I live in the US or that US laws govern Canada as well? I am not sure but I can say for the record that I am not breaking any laws at least here in Canada where I live.

I know in the US that wholesalers and retailers by law have to sell Airsoft guns with the affixed orange tips on them, once the end user receives that gun and depending on which state they live in, it may or may not be legal to remove the orange tip. Again, you will need to look into your local state laws as they are different from state to state in the US.

Categories: 4.5mm / .177 cal, 6mm, Airsoft, BB, Blank Gun, Comparison, Gun Law, How To, Pellet, Pistol, Q&A Video, Revolver, Rifle, YouTube Video Tags:

Clay Pigeons as Reactive Targets for Airguns and Airsoft Guns

2 Comments

If you have been watching my Full Auto Fun Videos, then you will have noticed that I have recently been using Clay Pigeons as my go-to targets. Generally Clay Pigeons are shot from launchers and used with shotguns since the flight of the Clay Pigeon simulates a bird in flight nicely.

So I thought, why not use them as reactive targets for my Airguns and Airsoft guns? It turns out they work pretty darn good, well at least with 4.5mm Steel BB pistols and I would imagine even better with pellet guns. What about Airsoft guns, will the Airsoft lighter weight plastic BB's have enough mass to get the job done?

You'll have to watch this video to find out the answer to that question when I unload a full magazine of .20 gram Airsoft BB's into some Clay Pigeons using my KWC .50 Desert Eagle...

 
Categories: Field Test, How To, Review, YouTube Video Tags: Desert Eagle, KWC

How to Fix Leaking CO2 in an Airgun?

8 Comments

A very common occurrence with CO2 Airguns and Airsoft guns are leaky CO2 seals. Usually this occurs right where the CO2 cartridge connects to the main valve area. This can be either in the gun or in the magazine depending on the setup of the airgun.

There are many reasons why this can happen, but the most common reasons are a worn-out or dried up seals or even a seal that has been imprinted or misshapen from the constant pressure of the tip of the CO2 pressing against it.

When this happens you may encounter a leaking CO2, the severity of the leak can vary from mild slow leaks to leaks that can be so bad that the gun is unusable. Keep in mind there can be other problems not related to the CO2 seal such as in the valve area, the fix I show you in this YouTube video will not fix a leaking valve, you can try using something like Crosman Pellgun oil for a problem like that.

Watch my below Vimeo video where I show you how you can easily use some Plumbers Teflon Tape to improve the contact points between your CO2 and CO2 main seal and eliminate leaking CO2 in your Airgun.

Categories: CO2, How To, YouTube Video Tags:

How Long Can I Leave CO2 in My Airgun?

1 Comment

A very common question I get asked is "How Long Can I Leave CO2 in My Airgun?" So what do I do when I get asked a question over and over again... Well I make a video and give you my answer to the question.

Some CO2 Related Questions I seem to get over and over again are:

  1. Can I leave an unused CO2 in my Airgun and for how long is it safe?

  2. Can I reuse a C2 once it is empty?

  3. Can I use my gun without CO2?

In this YouTube video I address questions 1 and 2, I kind of forgot about question number 3 since it is not as often but it does come up from time to time believe it or not and the answer to being able to use a CO2 airgunwith out CO2 is "NO", It's kind of like trying to drive a car without gas, or turn on a light without electricity or stay alive without food...

So anyways, watch my below Vimeo video for answers to questions one and two:

Categories: CO2, How To, YouTube Video Tags:

Airgun Usage for Hunting and Pest Control

2 Comments

This may be a bit controversial for some people who don't like the thought of using an gun for hunting or extermination of unwanted pests. But weather or not it is accepted by all, it is a practice that many people still embrace including myself when done in a humane way.

Let's start off by addressing this topic by asking some questions and filling in some of the answers. Keep in mind I go into much more detail in my Vimeo video below.

What is the reason that you need to Shoot or Hunt an Animal?

Are you shooting an animal out of need or just for fun, sure there is a thrill in the sport of hunting but after taking down your prey, the animal should not be killed in vain as the meat should be eaten. There are also times when pesky critters get into your gardens, tree farms, feeding stations garbages and who knows what else? I personally think shooting an animal that has not done you any harm or that you don't plan on eating is not ethical. So question your motives wisely?

Can you use an Airgun for Hunting and or Pest Control?

The short answer is yes! As long as you choose the correct Airgun for the job, one that has enough power and accuracy to get the job done in a humane manner. Using an underpowered or inaccurate gun of any type for the chosen target will lead to the animal being wounded and possibly getting away to suffer unnecessarily.

What about Pistols versus Rifles?

Given the choice, a rifle will always be your best bet, rifles tend to be more accurate since they are more stable to hold and the fact that the sights are further apart which improves the guns accuracy. Most rifles also allow for enhanced sighting systems like red dots or magnified scopes for even further accuracy improvements. There are some pistols made specifically for hunting and target shooting that can be accurate but I would limit their use to shorter ranges.

What about Pellet guns versus BB guns?

BB guns in general are not meant for hunting or pest control, and in most cases they are underpowered and not as accurate as their pellet shooting counterparts, especially out at longer ranges where most pests keep their distances to. If you plan on doing some hunting and or pest control, please invest in an adequate pellet rifle to get the job done humanly.

What type of Ammo is best for Hunting and Pest Control?

There are lots of types of pellets available, pointed, rounded, flat, hollow-point and even pellets that have nylon tips. At the end of the day, use the pellet that is the most accurate in your Airgun because shot placement will win over pellet shape any day of the week. The reality is that as long as that pellet hits the target with adequate velocity, it doesn't matter what shape it is, it's more than likely going to pass right through the animal.

What is the lowest FPS that I can use?

I would rather ask the question, what is the highest fps I can get away with since more fps will give you more margin for error, since it will have a flatter trajectory and will do more damage even if your shot is off a bit. An experienced shooter could make a kill shot on a small pest even with a 400 fps airgun but the shot would have to be perfect and the range would have to be close. Of course when shooting larger game, you will need larger caliber pellets with higher velocities. Also when using a high velocity airgun you need to consider what is beyond your target, if you miss, where is that pellet or bullet going to end up? You need to make sure you do not injure anyone by mistake as pellets/bullets can travel a long distance.

How large of an Animal can an Airguns Kill?

This is really dependent on the Airgun being used, Airguns come in many different calibers, from .177 right up to .50 caliber, some PCP Airguns can even take down a deer! You need to do your research and make sure the Airgun you choose has both the power and accuracy you need for the intend prey.

Where can I use an Airgun for Hunting and or Pest Control?

This is a question you need to ask your local authorities as laws and hunting regulations are different just about everywhere. Even shooting pests on your property may require a permit so be careful to obey your local laws.

Categories: .20 cal, .22 cal, 4.5mm / .177 cal, BB, Break Barrel, Bulk Air, CO2, Comparison, Full Auto, How To, PCP, Pellet, Pistol, Rifle, Scope, Semi Auto, YouTube Video Tags:

How to Load Your Air Pistol

No Comments

In many of my reviews I show the loading process of each gun but sometimes I either skim over this part or assume most people already know how to load an Air Pistol and skip it entirely. Well as it turns out not everybody does know how to load up an Airgun or they are unclear on certain areas, like do you actually need the CO2 and how long can you leave CO2 in an airgun?

So I made a video specifically to cover how to load CO2, BB's and/or Pellets into your Air Pistol.

Now even though this video is targeted at 4.5mm Steel BB and Lead Pellet Pistols, there is a crossover with 6mm Airsoft Pistols so this video may also help an Airsoft shooter.

Our Family Bearded Dragon (Dijon) was looking rather sad and lonely today so I figured he could hang out while I made the video, he really doesn't do much of anything most of the time so why not give him a special appearance in one of the Replica Airguns Videos ;)

Categories: 4.5mm / .177 cal, BB, Blowback, CO2, How To, Pellet, Pistol, Semi Auto, YouTube Video Tags:

Will this Ammunition Work in my Gun - Can I Convert a Blank Gun to a Real Gun?

3 Comments

Two questions that come up over and over again and to be honest I just hate answering, mainly because both of these questions to me are kind of common sense questions. I feel if someone where to stop and actually think about teh question, the answers would become obvious.
That said, common sense has to be learned somewhere and not all of us are exposed to the same life experiences so here goes...

The two questions are:

  • Will this Ammunition Work in my Gun?

  • Can I Convert a Blank Gun to a Real Gun?

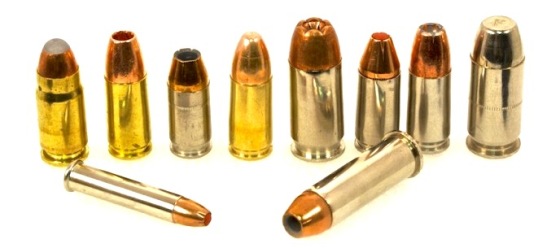
The answer for both of these question is actually the same! Use the ammo made for your gun and do not try to use anything other than the ammo that was made for your gun. Do not try to modify your gun to shoot anything other than the ammo that was made for it, if you do, you may be breaking the law and could land yourself in jail. If you can follow these rules then your ammo and gun will work as intended :)

So that's pretty much it in a nutshell, watch my YouTube video below as I show you examples of ammo types with visuals on exactly why you need to use the ammo made for your gun. I also talk about the dangers of attempting to modify a blank gun to shoot some sort of real bullet and why it is a very bad idea in so many ways to try and convert a blank gun into a real gun.

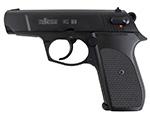
rohm RG-88.jpg
Categories: Gun Law, Gun Safety, How To, Real Gun, YouTube Video Tags:

How to Align Your Gun Sights on Target

No Comments

This video should go "Hand in Hand" (pun intended) with my Best Two Handed Pistol Grip Tutorial Video that I did last year back in August. After that video I had several people ask me to talk about how to aim a gun. I guess if you have been shooting guns for a while you kind of take it all for granted but after teaching my kids the proper way to aim a gun at a target, this info is not naturally born into us ;)

This video demonstrate how and where to place your open gun sights on a target and also how you can compensate for a gun that may not be perfectly sighted in.

Categories: How To, YouTube Video Tags:

Testing Out LED Lighting with my F1 Chrony Chronograph - Take 2

No Comments

This is take 2 of my Modification to my F1 Chrony Chronograph. The purpose of this modification is to improve the low light FPS readings. In my first attempt I used LED Puck Lights but they where the kind that used flat panel LED's and they only had 4 panels per LED Puck which made each LED panel kind of bright. I did get OK with my first mod using LED Puck Lights but not as good as I would like to see.

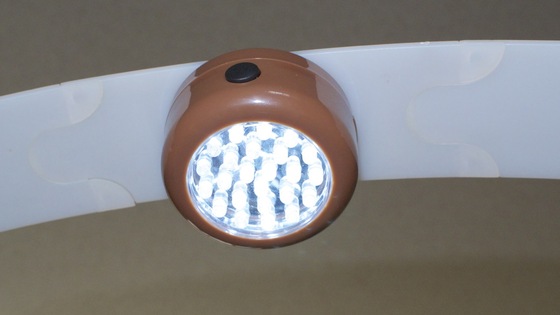
So here we are with take 2 of F1 Chrony Chronograph LED Puck Light modification and this time around I am using standard bulb styled LED lights and to improve my chances of this working I went with and LED Puck that contained 24 LED bulb lights per puck, this way each light on it's own is a bit dimmer which I feel will give a more diffused lighting effect and hopeful consistent fps readings.

By the way I got these LED Puck Lights at my local dollar store for $2.50 each so not a very expensive modification, especially if they work.

Well... Watch the video and see how they perform...

Categories: How To, YouTube Video Tags:

Testing Out LED Lighting with my F1 Chrony Chronograph

No Comments

This video was made to show you the results I got by mounting LED puck lights to the top of my F1 Chrony Chronograph defuser panel in order to improve the low light Feet Per Second readings when using 4.5mm Steel BB's.

I have been struggling with my F1 Chrony Chronograph during the fall and winter months as tit becomes overcast and dark where I live. There have been days where I have gone out to shoot my field test shooting video and not been able to get any Chronograph fps results which is very frustrating because much time and effort goes into the planning setup of each video.

I was given advice from several of my viewers to mount an LED puck style light on the back side of my Chronograph defuser panel and that this helps the Chronograph to read much better in low light situations.

I bought a multipack of the LED puck lights from my local Costco but they did not work as well as I expected them to as they had a panel style of LED rather than the bulb shaped LED which I think may diffuse the light a bit more. My next experiments will be done using LED Puck lights but with the bulb styled LED.

You can watch my video to see how my first attempt using an LED Puck light with my F1 Chrony Chronograph worked out.

Categories: How To, YouTube Video Tags:

How to Handle Your Gun Safely

4 Comments

In this informative video I go over the very basics of gun "handling" safety. I don't talk about gun storage or even shooting of the gun, I strictly go over the main aspects of handling a gun in a safe manor.

These are the four main points I demonstrate in this video:

  • Fingers off the trigger till you are ready to shoot.

  • Keep the gun unloaded till you are ready to shoot it.

  • Assume your gun is loaded at ALL times.

  • Always point your gun in a safe direction.

Hopefully this video will prevent some unfortunate accidents, even airgun related accidents can cause serious injuries which in most cases can be prevented with the correct gun handling information.

I have made a

similar safety video

where I talk about general gun safety and speak more about storing and also some gun shooting safety tips.

Categories: Gun Safety, How To, YouTube Video Tags:

How to Make a New Gun Look Vintage - Old and Worn

1 Comment

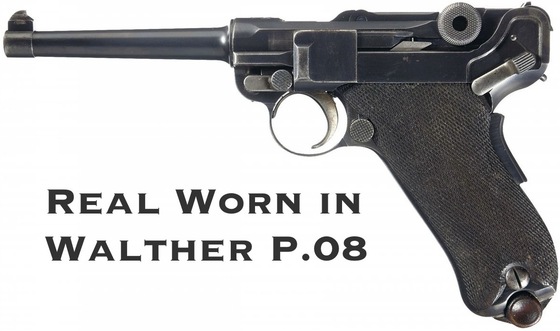
You really need to watch my Vimeo Video to see how easy it is to take a brand new out of the box gun and give it that weathered, old, worn and used look that you would find in a classic vintage gun like a Luger P.08, Colt 45 1911 or any other classic firearm. Of course this is something you would do to a new gun that you want to make look old :)

This is a great way to take a gun that already has some wear marks on it and really give it the full worn in look, kind of an alternative to having to touch it up or refinish it.

Here is a hint... I use something magical to do it!

Categories: 4.5mm / .177 cal, BB, CO2, How To, Pistol, Semi Auto, YouTube Video Tags: Luger P08, Umarex