Entries in Multi-pump,How To

Webley Alecto - Zoraki HP-01 .22 Caliber for Pests and Vermin Control

6 Comments

I want to say first off that I don't take any pleasure in killing animals, even the ones that invade my home and eat my crops, but unfortunately there are times when you have to do what you have to do and restore order.

I live on six acres of land and only really have a problem with two pests, and that would be Rats and Flying Rats, (otherwise known as Crows). The Rats get into my garbage and even into the house at times and chew and eat things that don't belong to them making a big mess. The Crows on the other hand eat the cherries and plums on my fruit trees and seem to take pleasure in killing the Blue Jays and Robbins that are trying to make a home on my farm.

I have purchased a dedicated .22 caliber Crosman Quest 800 pellet gun that is capable of 800 fps for the humane elimination of the Rats and Crows that are not welcome on my land. I use this Pellet Rifle most of the time to quickly and humanely dispose of the pests and vermin.

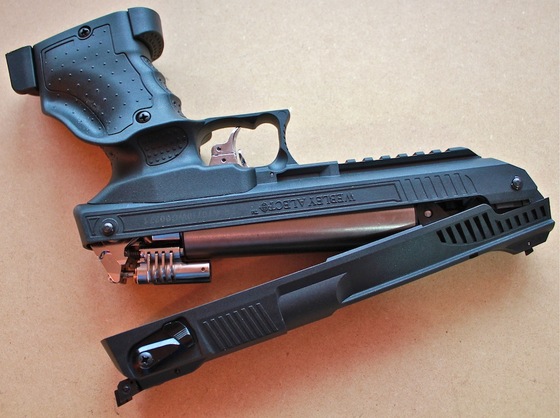
I recently purchased the Webley Alecto (Zoraki HP-01) in .22 Caliber and thought it would make a great compact pest control gun as it has good power and accuracy and is available in .22 caliber which puts more raw energy into the target. It is the time of year again when the young Crows that have not yet learned to stay away from my property start coming around and causing a nuisance, so I thought this would be as good a time as any to try out my Webley Alecto.

The target was a medium sized crow about 40 feet away. My Webley Alecto was sighted in and ready to go with 18 grain Beeman Crow Magnum hollow point pellets. I pumped it up to the max and took aim, the crow immediately went down and landed in my pool area. Unfortunately I winged him, I really mean it because his wing was obviously broken. I waited for him to settle down (there was nowhere for him to go in the fenced off area) and put one last round into him, again from at least 40 feet away. The second shot was a head shot and it was game over.

I was shooting a bit far out for open sights in this case but even so I put both shots into the Crow. Adding a low power Scope or even a Red Dot would make extended range shooting with the Webley Alecto a bit more precise. The Webley Alecto is definitely up for the job of taking care of the Pests and Vermin around your home or farm. My father is even going to pick up a Webley Alecto for his hunting trips to use as a grouse gun when he is out hunting larger game. The Webley Alecto is fully legal to carry in Canada (non-controlled firearm) and very compact.

Well hopefully I have not offended anyone? Just remember, this is a gun website and guns get used for many things, one of which is taking care of business - just as they where designed to do!

 
Categories: .22 cal, Field Test, Multi-pump, Pellet, Pistol, Single Shot Tags: Alecto, Webley

Added the Webley Alecto Left Handed Grips to the Store

No Comments

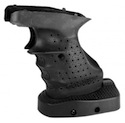
This may not be a big deal to most of you but if you happen to own or are thinking about getting a Webley Alecto in either a .177 caliber or .22 caliber pellet version, and you are a left handed shooter... then having the appropriate grips is going to make life just a little easier for you!

If you haven't taken a look at the Webley Alecto, maybe you should because it is a pretty amazing Pellet Pistol for target or pest control.

Categories: .22 cal, 4.5mm / .177 cal, Accessory, Multi-pump, Pistol, Replica Airguns News, Single Shot Tags: Alecto, Webley

Webley Alecto PCP .22 cal. Air Gun Chrony Test

2 Comments

Related Posts:

I have been wanting to do a Chrony test for my Webley Alecto as I didn't have a chronograph at the time of my original review. Today was the day I got around to it and I am really happy with the results I got. Mine came with the pressure release valve adjusted fairly conservatively. I imagine this is a generic setting that is set the same for both the .177 caliber and .22 caliber versions based on the lighter .177 caliber having a faster muzzle velocity and hittiing the 495 fps with less pressure required.

In the case of a .22 caliber pellet and it having approximately double the weight, the pressure release valve may be adjusted a bit on the light side, but I was only guessing and I wanted to make sure I didn't have an air pistol shooting over 500fps as this would make it a restricted firearm here in Canada and although I have my restricted firearms license, I didn't want to have this particular pistol governed by the rules and regulations of a restricted firearm.

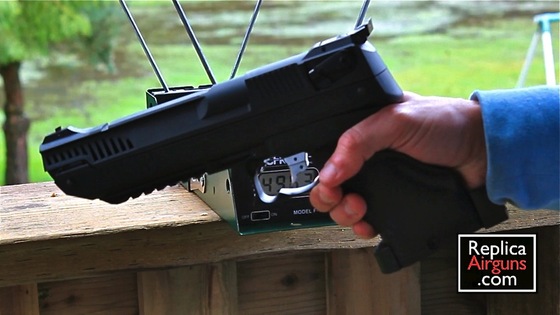
So lets get to my results. I was using crosman premium 14.3 grain pellets for this test, far from the heaviest .22 caliber pellets you can get. I also tested my Webley Alecto out with one, two , three and even four pumps. Keep in mind pumping the Webley Alecto four times is not recommended by the factory and could cause long term damage to your Alecto. I did it with mine because I will ultimately get asked what an extra pump will give you in terms of extra fps. 

  • One Pump: 270.9 fps

  • Two Pumps: 390.5 fps

  • Three Pumps: 449.8 fps

  • Four Pumps: 487 fps & 496.3 fps

So as you can see, I did not go over 500 fps even with four pumps which is exactly where I wanted this pistol to be around. If you do decide to do the pressure release valve mod on your Webley Alecto, I would recommend you also test yours out on a chronograph just in case your results are different then mine, and keep in mind modifying the Webley Alecto could void your warrantee. The last thing you want to be carrying around is an illegal firearm!

 
Categories: .22 cal, Field Test, Modification, Multi-pump, Pellet, Pistol, Single Shot, YouTube Video Tags: Alecto, Webley

Webley Alecto - Zoraki HP-01 .177 & .22 Caliber PCP Air Pistol Review

9 Comments

Related Posts:

Type: Multi-pump Air Pistol.

Manufacturer: Webley - Zoraki ATAK Arms.

Model:Alecto -  HP-01

Materials: Polymer shell with metal internal parts.

Weight: 2.4 pounds.

Barrel: 7.2 inches, metal rifled.

Propulsion: MSP Multi-stroke pneumatic.

Action: Single shot.

Ammunition Type: .177 & .22 caliber pellets.

Ammunition Capacity: 1 pellet.

FPS: 495+.

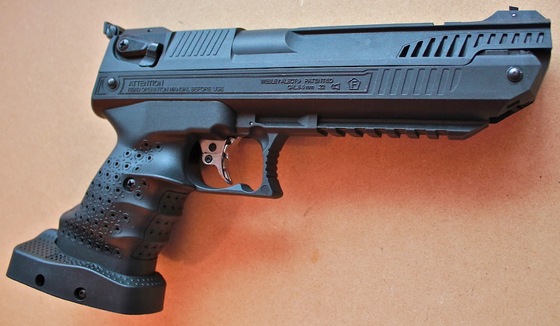
Trigger Pull: You simply can not get a better trigger. You can adjust it left and right and forwards and backwards. You can also adjust the tension from .9 lbs to 4 lbs and the break point is smooth as butter.

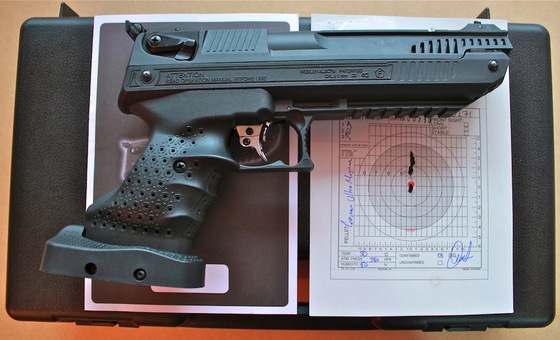
Accuracy: Awesome, I got about a 1 inch group from a free standing position 20 feet away.

Build Quality: Build quality is excellent, it does have an external outer plastic shell but it is very solid and made of what seems to be high quality weapons grade polymer. All the internal mechanical parts are made out of metal.

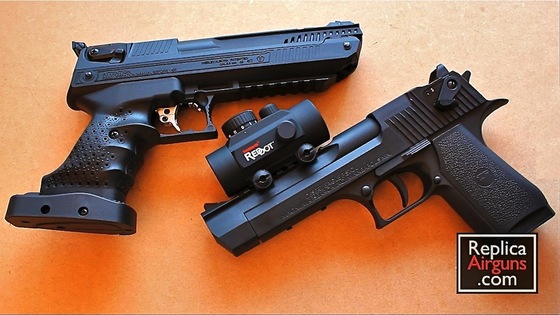
Realism: This is not a replica air gun but it does resemble the Desert Eagle in shape and size.

Purchased From: the Replica Airguns Store.

Pros:

  • Very accurate for a pistol.

  • Only a few pumps generate a lot of power.

  • Fully adjustable trigger and grips.

  • Fully adjustable sites, including a rotating front site for quick adjust near and far shooting.

  • Great safety design with one finger operation.

<!-- google_ad_client = "ca-pub-9036472715040282"; /* Replica Airguns Content */ google_ad_slot = "1487049688"; google_ad_width = 468; google_ad_height = 15; //-->

Cons:

  • If you're left handed you have to buy the extra left hand grip separately.

  • Comes with the pressure release valve adjusted a bit too lean. (seems to let pressure out even with only two pumps)

  • May be a bit to large for small handed shooters.

Comments:

I originally got this target air pistol mainly to test it out and do a review for the website, thinking I was going to send it back at the end. After playing around with it for a while, I have decided I simply can not part with it. The Webley Alecto is just to addictive to shoot and has such great power and accuracy that you kind of forget it's not an action shooter. you get lost in literally blasting away anything you point it at.

My table top Vimeo Video Review of the Webley Alecto Target Pistol:

Categories: .22 cal, 4.5mm / .177 cal, Multi-pump, Pellet, Pistol, Review, Single Shot Tags: Alecto, Webley, Zoraki

Webley Alecto .177 and .22 Caliber Multi-Stroke Pneumatic Target Pistol

1 Comment

Related Posts:

The Webley Alecto isn't exactly a "Replica Airgun" but it's really addictive to shoot and OK maybe it looks just a bit like the Desert Eagle? Unlike most BB guns, the Webley Alecto is all about accuracy and consistency. I found myself shooting at all kinds of targets just to see if I could hit them and this gun is simply amazing. It is essentially a PCP compressed air gun that has a three stage pump, you can pump it up to three times to get the maximum feet per second.

I found the one I have (Canadian Version with detuned pressure release valve) had little to no fps gain pumping it the third time because to be imported into Canada it must shoot under 500 fps. The valve can be adjusted internally but you risk higher then 500 fps shots which would make it a Restricted Controlled Firearm in Canada.

One of the most amazing attributes about this compressed air gun is the trigger, it's fully adjustable and smooth as butter. Another nice attention to detail is the included hard shell case and factory quality control test target.

The gun is made in Turkey for Webley by Zoraki and is the HP-01. Unlike the Zoraki version (.177 cal. only), with the Webley Alecto, you have the choice of either a .177 or .22 caliber. I went for the .22 caliber model and mine will for sure get a Red Dot Scope mounted on it one of these days :)

Categories: .22 cal, 4.5mm / .177 cal, Multi-pump, Pellet, Pistol, Single Shot Tags: Alecto, Webley, Zoraki

Cybergun - KWC Mini UZI BB Gun Full Auto Modification

39 Comments

Related Posts:

"Before you attempt to do this modification you need to be aware that it may void your warrantee and/or you may fail and either break something or incorrectly reassemble your Mini UZI rendering it "Broked"! This is your problem so please do not attempt this modification (even though it is fairly easy to do) unless you're 100% confident you can do it and are aware of the possible consequences. Make sure to also take into account any gun laws in your area prohibiting full-auto capable firearms!"

(Special thanks to Herman for showing me the ropes on this modification)

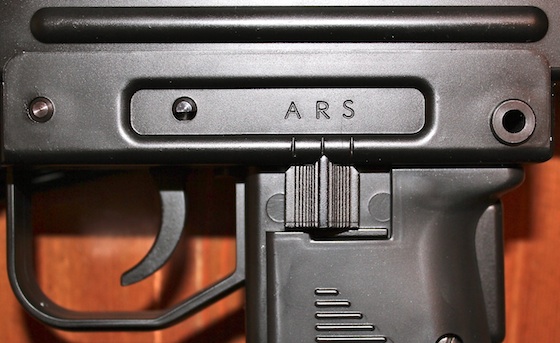
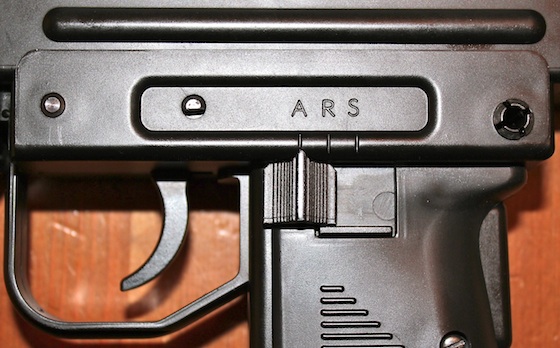
This modification will make your semi-auto "only" Cybergun/KWC Mini UZI BB Gun into a full auto capable 4.5mm BB machine gun. From the factory the full auto switch position (Far Left "A") is disabled but the full auto selector position is visible. The actual full-auto functionality is still present in the Mini UZI but has been decommissioned by the simple means of blocking the selector switch from being moved to the far left full-auto or "A" position.

This full auto modification will show you how to disassemble the Cybergun - KWC Mini UZI BB Gun and remove the small plastic selector switch blockage so you will be able to manually switch between semi auto and full auto modes. This modification takes about 15 minutes to complete.

<!-- google_ad_client = "ca-pub-9036472715040282"; /* Replica Airguns Content */ google_ad_slot = "1487049688"; google_ad_width = 468; google_ad_height = 15; //-->

You will need the following tools: A pair of pliers and either a pair of small wire cutters or a file.

Let's begin! Below are the two pre-modification positions available from the factory:

"S - SAFE"

"R - SEMI AUTO"

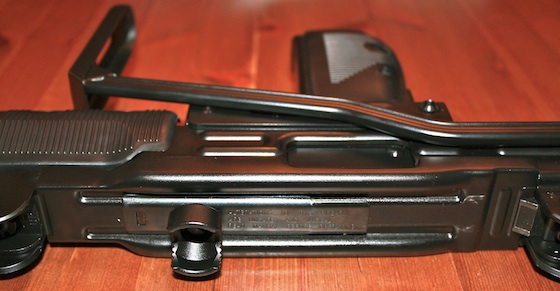
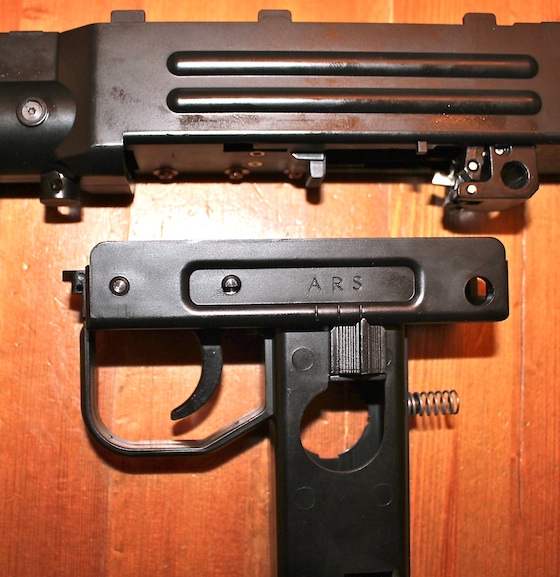
Below is a closeup of the top bolt cover that we will be removing to access the internal bolt for removal:

In the next photo we have removed the bolt cover by pressing the "angled button" towards the rear sight:

And now the bolt is removed:

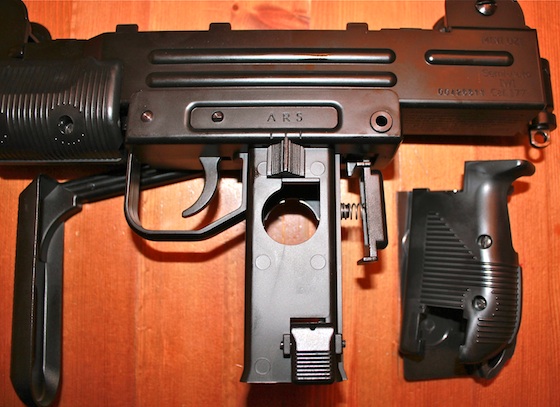
I removed the grips but this is not necessary:

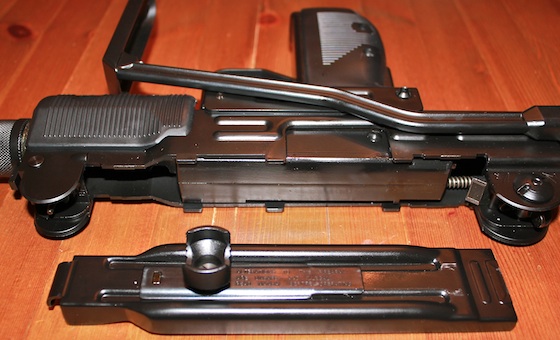
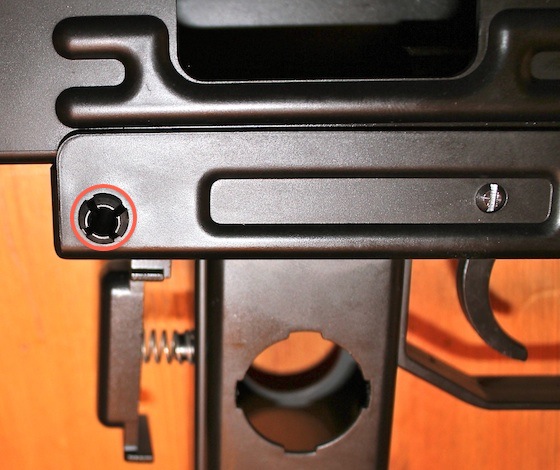
Now you will need to remove the lower receiver pin located at the back end of the receiver closest to the grip safety. Use a pair of pliers to pinch the metal pin while pushing it through. Once the pin is started you can use the pliers on the other side to pull the pin all the way out. You may need to us a fair amount of force to do this as the fit of the pin is tight:

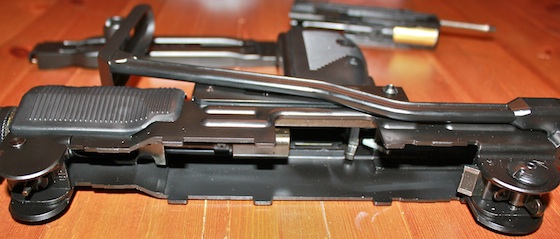
Once the pin is removed the lower receiver can be detached:

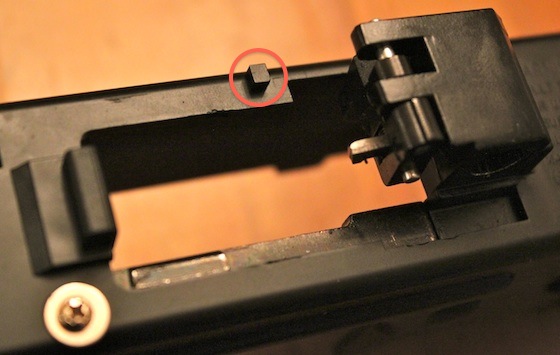
You can see in the picture below the small plastic nub that we will need to remove in order to restore full-auto capability:

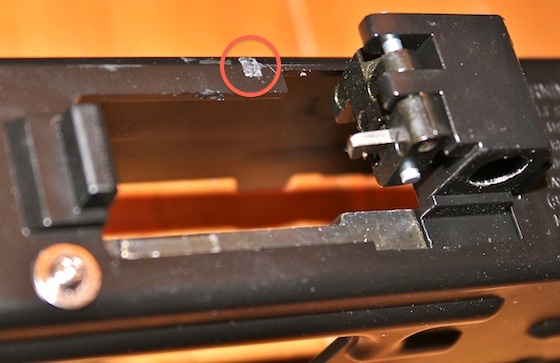
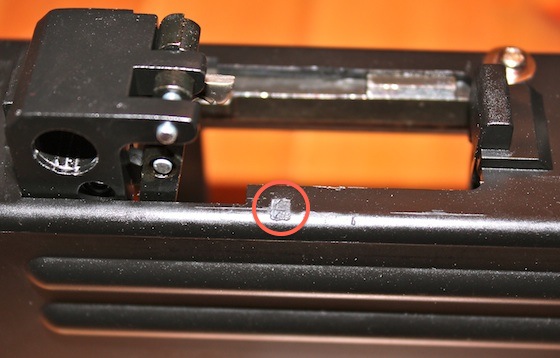
I used a pair of small wire cutters to clip this plastic nub off, but you could use a file too. Just make sure that the plastic is flush and does not have any burs or protrusions.

Below is a photo of the Plastic Nub removed from another angle:

After that, all you need to do is reassemble you Mini UZI in revers order to finnish the Full Auto modification.

In the below Photos you can see we have restored the ability to move the fire selector switch over to the "Far Left" or "A" position, reenabling the Cybergun - KWC Mini UZI BB Gun to shoot in full auto when desired.

"A - FULL AUTO"

Now enjoy your Cybergun - KWC Mini UZI BB Gun in full-auto as it was originally designed!

Here is my Vimeo Video in Narrative with Photos:

Categories: 4.5mm / .177 cal, BB, Blowback, CO2, Full Auto, How To, Modification, Pistol, Semi Auto, YouTube Video Tags: Cybergun, UZI

SIG SAUER X-FIVE P226 TAKE DOWN FOR STRIPPING AND PAINTING

17 Comments

This Article was graciously provided by one of my viewers: Lee

Related Posts:

DISCLAIMER, PLEASE READ AND UNDERSTAND!

  • This walkthrough is for information purposes ONLY, if you decide to dismantle your BB gun you will void any warranty you have with the manufacturer.
  •  I will not be held accountable for your actions or any damage that is caused by your negligence. Therefore, if YOU decide to dismantle your BB gun and break something during the dismantling or assembling it is your problem not mine.
  • If you don’t feel confident or comfortable doing any of these steps STOP and do not proceed any further or you may do damage.
  • YOU WILL LOOSE ALL THE SIG SAUER MARKINGS ON THE GUN.

Having said all that, this is my first ever instructional so I’m going to try and make this walkthrough as easy as I can for you to understand. You will need the following: Flat tip Screwdriver for the grips, Small Philips Head screwdriver, small punch & needle nose pliers – the last 2 are optional.

Make sure you have a clean work space and lay out every part in the order that you remove it Left to Right, come reassembly time you work Right to Left it makes reassembly so much easier.

Step 1:

Field Strip the slide until it looks like this:

Unscrew these 2 screws, these hold in the “Breech Block” once your unscrewed cup the end of the slide in your hand and let the Breech & Screws fall in your hand – Set these aside.

That’s it your Slide should look like this:

It is now ready for paint removal.

Step 2:

Take the Frame and start removing the grips Left hand side first:

Flip the frame over and remove the right hand side grips:

Carefully remove the trigger return spring, it is under tension and it WILL fly across the room – I spent an hour looking for it one day! Also while we are at it, you can remove the cover to the magazine release.

To remove the safety, place your flat tip screwdriver between the frame and the safety and twist ever so gently this will separate the safety and all you need to do now is grab the safety from either side and gently pull & wiggle until it separates.

Once the safety is removed you will see the safety bar, this lifts off.

Step 3:

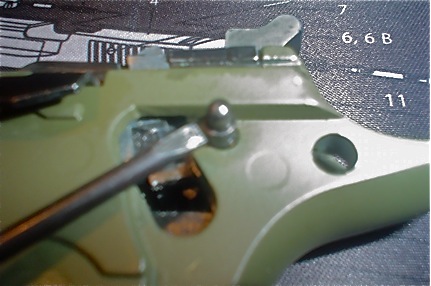
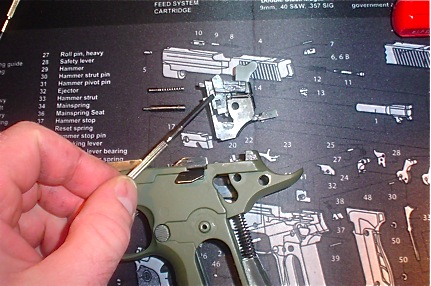
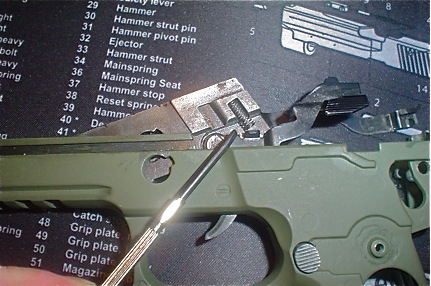
Lift this little pin out and remove the spring, very carefully push this pin from the other side and remove, be careful because once this happens your hammer assembly is loose and free from the frame.

Slowly and gently remove the hammer assembly:

Note the little shiny piece that sits on the side of the hammer assembly, try very hard not to let this piece fly out, it is a pain to get back in, if it does fly out keep calm and take your time, don’t force the little spring in, it seats in behind the shiny metal thing – sorry I don’t have a proper name for it.

Also make sure that the spring next to it is in the locked open position, if it snaps back just get the tip of a small screwdriver and slide it to the left until it locks.

The hammer return spring assembly at the back of the grips can be removed and set aside.

Removing the trigger assembly is easier than it looks; you need to remove the takedown lever by rotating it counter clockwise until it stops.

Push it through the frame and rotate it back clockwise to remove it all together.

Remove the screw holding the trigger assembly:

Lift out the trigger assembly; be careful of the slide lock spring it wont Fly out, but it will fall out.

If you want to remove the magazine release, there is a spring that sits at the rear of the trigger guard;

Push the magazine release in part way & with the flat tip screwdriver lifts the up to remove it, once removed the magazine release will simply fall out.

THAT’S IT! We’re done, ready for the paint removal. Any paint stripper is fine.

KEEP IT WELL AWAY FROM THE PLASTIC PARTS!

Follow the manufacturer’s guidelines for use of their product and thoroughly clean the slide and frame after you have removed the paint.

YOU WILL LOOSE ALL THE SIG Sauer MARKINGS ON THE GUN.

Rub over the slide and frame with #0000 Steel wool or 1200 grit Wet & Dry paper. Clean again and using the paper or steel wool with some ALUMINUM polishing compound like Autosol and some good ol fashioned elbow grease polish the slide and frame until you reach your desired outcome. Clean it all down again and wipe it down with a rag that has had gun oil or my preference “Fluid Film”.

Reassemble the gun in the reverse order and viola one shiny SIG Sauer X-Five.

Categories: How To, Modification Tags: Cybergun, Sig Sauer X-Five P226